

Vanlife or Skoolie Plumbing is easier to set up and install than most people imagine. It is DIY-Friendly, and can be accomplished with a little research, good planning, and a few basic tools. Your Water Setup can be anything from a very basic gravity-driven design, to a full-scale system that behaves just like the plumbing in your current home.
The overall size and scope, in this case, will depend on how much room you have, how many people, how many Fixtures, and how often you want to refill the Fresh Water Tank. Your Budget is also a factor, but the “nuts and bolts” of a full water setup isn’t prohibitively expensive. - You will spend more on appliances than you will on a Tank, Pump, Pipe and Filters. – To that end, if you know ahead of time that you might want add more fixtures at a future date (Sinks, Laundry, Showers, etc.), you should “rough them in” when you do your initial install and complete the plumbing on those items later.
Tech Tip: - Water usage varies greatly from person to person, but for the rough math we like to assume 2.5 gallons per day per individual. This is assuming that they are conservative with water, take a quick shower every other day, and sponge bathe whenever possible.

The Most Basic Water Setup would be to simply place a Fresh Water Jug above the sink and drain the Grey Water into another small jug that you literally take out and dump when it's full. You could purchase those 2.5 gallon drinking water containers and set them on a shelf above the sink. They come with a tap, so apart from a little bit of drain pipe (or hose) your entire plumbing expense would be the cost of a sink and, perhaps a seal-able jug for the Grey Water.
What we'll call a “Full Skoolie Plumbing System” would look like this:
The next step beyond the “Basic Setup” above would be to add a permanently mounted Fresh Water Tank and a Water Pump to pressurize the system. – Once you have done that, you essentially have the “Core” of a Full Plumbing System. From that point it comes down to how many Fixtures and Appliances you add, and a few Optional Features that we will explain below.
Click the image for a larger view and use it as a guide to follow the flow of water as described.
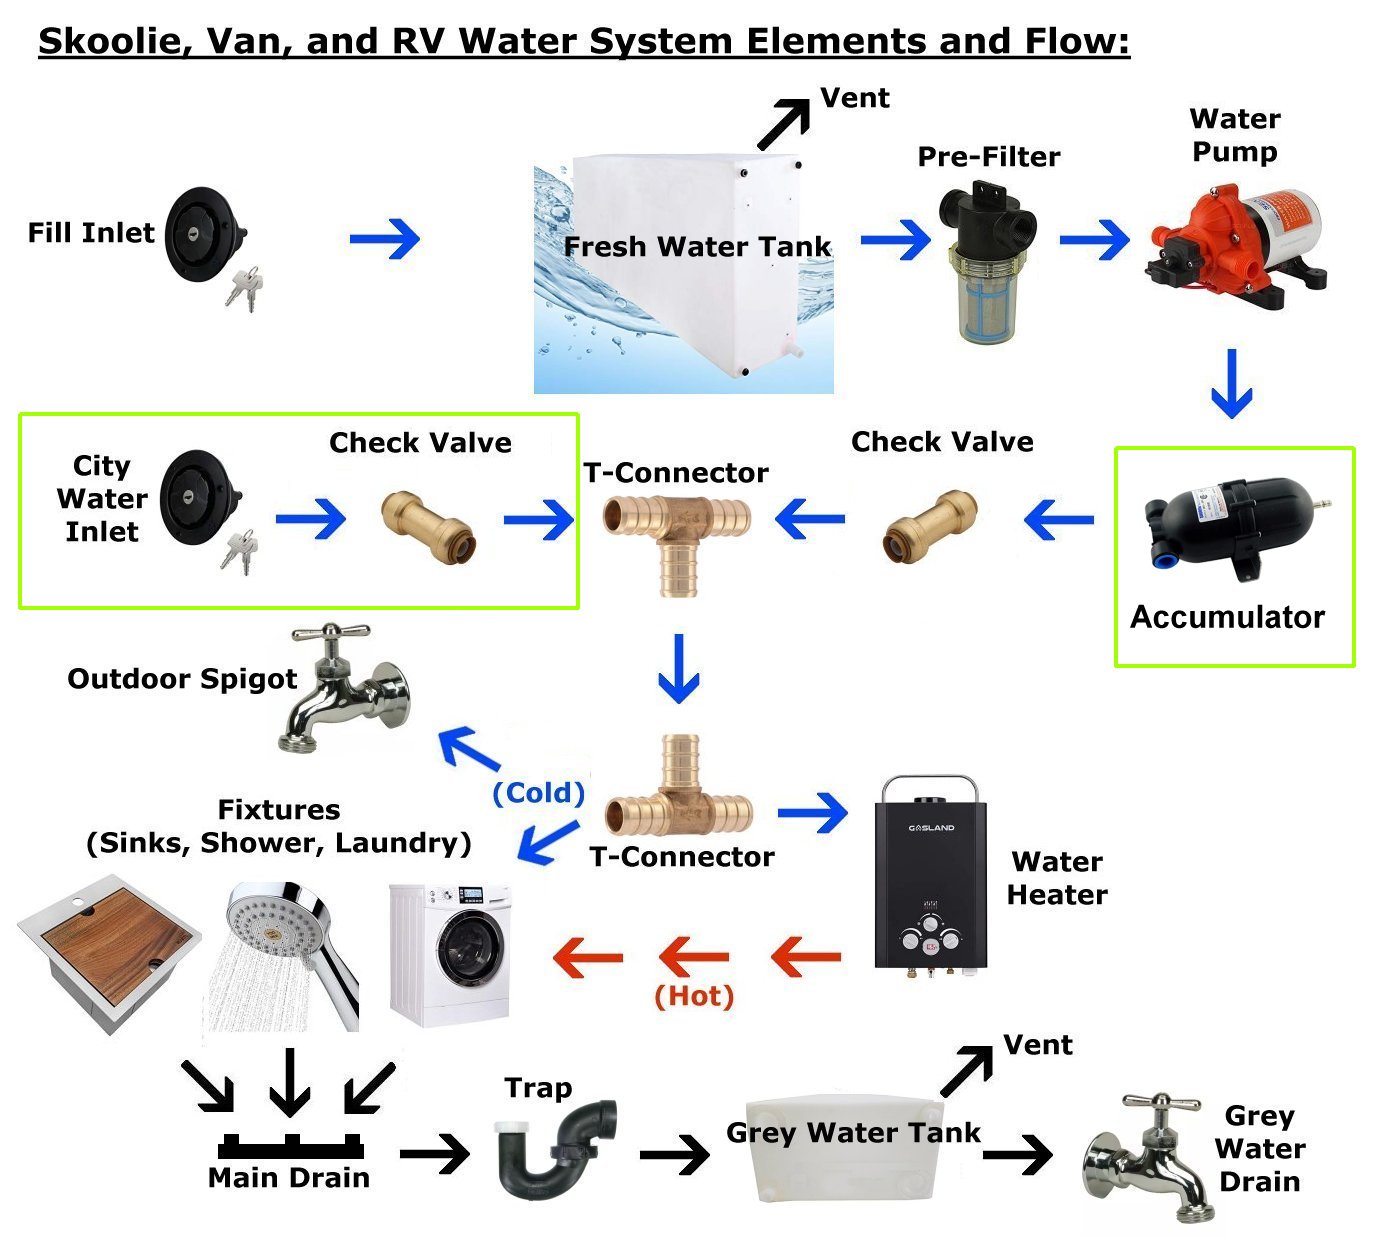
On the outside of your Rig, you have a Fill Inlet where you connect a hose to fill your to fill your Fresh Water Tank. Additionally, you can add a “City” or “Shore” Water Inlet that can use Pressurized Water from a hose to run your full system without draining your Tank or using your Pump. (You must bypass your Fresh Water Tank and your Water Pump on this plumbing line with a Check Valve.) Your Main Water Line comes out of the bottom of your Fresh Water Tank and feeds, through a Pre-Filter to your Water Pump.
If you opt to use an Accumulator (See Below) it goes in line after the Water Pump, followed by another Check Valve (one from the Water Pump Line and one from The City Water Line). The Check Valves ensure that water only flows in one direction.
The 2 Water Lines join at a T-Connector, with the output being the Main Water Line to the rest of your System. That line is split via another T Connector to supply the Water Heater. From There, The Hot and Cold Water Lines feed your Fixtures (Sink, Shower, etc.). Water drains from your Fixtures to a Grey Water Tank (usually mounted under the Rig). A Grey Water Drain allows you to drain the Tank as needed.
Tech Tip: - 1.) Don't forget to install a “Trap” right before the Grey Water Tank to keep odors from traveling into the living space through the drains. 2.) Use a Spigot (or “Hose Bibb”) for a Grey Water Drain so you can hook up a hose and direct the water wherever you desire.


From The Driver’s Seat: - In an effort to keep the graphic less “cluttered” we haven’t included any Shut Off Valves. You will, of course, want to install them in your System. - We recommend a Shut Off Valve before each Appliance or Fixture, including one before the Pump, one after The Accumulator, and one before and after the Water Heater. You will eventually want to repair or replace something, and being able to shut off the water is invaluable!
Let's address some common questions regarding Skoolie, Vanlife, and RV Plumbing:
Can I do a full Gravity Fed Water System?: - “Sort of.” This is something that just about everyone considers at some point in the design process. (“If I mount a tank on the roof I can feed the Fixtures without a pump.”) The truth is you can do that, however, there are a couple of important things to consider:
1. All of that water sloshing around can make life interesting when you travel. At 8.35 pounds per gallon, 100 gallons of water weighs 835 pounds. (50 gallons is almost 420 pounds.) When the tanks are half-full the water will “Surge” from side to side or back to front every time you make a turn or hit the brakes. Imagine having a 400 pound bowling ball rolling around in the back of the bus and how that would affect your steering or stopping ability.
2. You will get very little water pressure. It won’t be enough to drive a water heater, so you’d still be heating water on the stove and taking cold showers. - There’s nothing wrong with that, but in the end, if you have more than just a single sink in your Build Design, and want to have any type of Water Heater (or anything that requires water pressure), you might as well mount the Fresh Tank low and pay the $60-$70 for a decent Water Pump.

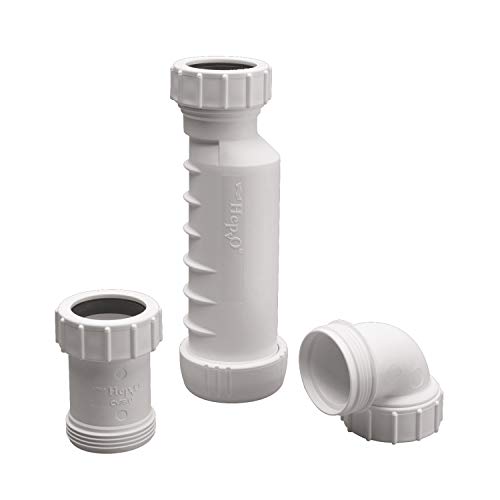
Do I have to use PEX Pipe in my Van?: - No, but you should. Technically, you can use Copper, PVC, or Galvanized if you are more comfortable working with them, but remember that the Rig will be bumping and jostling around much more than a house. Also, you may have a greater risk of pipes freezing in cold weather. PEX Fittings cost more, and we, at Skoolie Supply, are all about doing things on the cheap, but this is one area where spending the extra cash is far worth the expense, if not an outright necessity. The Speed and Ease of installation alone when using PEX make it the best choice. It's flexible, more resistant to cold, and a lot easier to repair.
Note: If you purchased an older existing RV, the factory plumbing is probably very cheap. It is often constructed with a series rubber hoses and plastic connectors, which will eventually break or leak once used for Full Time RV Living. It's a little more complicated to retro-fit these with better lines (PEX Pipe) and connectors, but it can be done. *You might as well upgrade the Sinks and Shower while you're doing it.

What are Water Inlets?: - You will need to refill your Fresh Water Tank from time to time. The most common way of doing this is by using a hose (Campground, Gas Station, Someone's house...). The Tank Fill is usually Gravity Fed, so this Inlet needs to be higher than the top of your Tank. You can add a second Inlet to run your entire Water System off of the hose as long as your parked in one place (“City” or “Shore” Water). *Remember that this makes it a fully pressurized system, so you'll need to bypass your Fresh Water Tank (so it doesn't overfill) and your Pump (so it doesn't burn out). -This is why we use the Check Valves as shown in the Chart.

Please Note* It is very important that you use a Drinking Water hose that is Lead and BPA free to fill your Fresh Water Tank. Use an entirely different hose to drain Grey Water, and for other applications, to avoid contamination. Click the image, or have a look on The Water Page for a few options.

Which, or What Size Fresh Water Tank is best for a Van?: - The most important thing to remember is to Only use a Certified Potable Water Tank. Even if you buy separate Drinking Water, the water from your tank will still be in the shower, on your dishes, and in your clothes. A Potable Water Tank is certified not to leech plastics or chemicals into the water it holds. -The size of your tank will be based largely on the room you have for it in your Design. Also, How big and how much water you use will dictate how often you refill. So, “The biggest one you can fit.” is really the best answer.
Mounting a Water Tank: - There are some creative ideas out there, but ultimately you want it completely stable and immobile. They usually come with brackets, flanges, or mounting bands, but if nothing else, you can frame it in with lumber or metal. Some people just use ratchet straps, but we’d advise something more permanent.
Do I have to Vent my Water Tank?: - Yes, Fresh Water and Grey Water as well. Anytime you add or use water from a tank it moves air to fill the space. Without proper venting the water won't flow.
Do I need a “Pre Filter” for an RV Water Pump?: - Yes. If you are using an Electric Water Pump a Pre Filter will prolong, if not save, the life of your pump at some point. Sludge or small particulates can easily end up in your Water Tank. Pumps aren't crazy expensive, but they can be difficult to replace (and potentially impossible if you happen to be boondocking when it goes). If you're exclusively using a Manual Water Pump you can get by without one, but it's still a good idea to mount one between the exit line or “drain” of your tank and the inlet of your Water Pump. Make sure you can access it, as you will need to regularly change the screen.
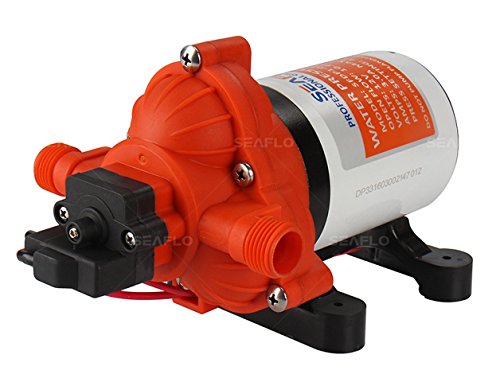
What's the best RV Water Pump?: - Factors to consider are Gallons Per Minute (“GPM”), system pressure, Power Usage, and Noise or Interference. Also, bonus points if you get one that will run “dry” or is “self-priming”. It's pretty easy to find a 3 GPM, 41-45PSI, 12 Volt RV Water Pump these days, and while that makes for great pressure, you could get by with less and not notice a huge difference. (Some Pumps will allow you to adjust the flow. Feel free to experiment.) You can often cut a lot of the noise simply by mounting a piece of foam rubber (like an old mouse pad) between the Pump and the wall. Models vary greatly in this regard. Some Pumps are just plain Louder than others, so read the reviews. They don't tend to vary as much in power consumption but the data can be surprisingly hard to find. Take some time looking into this, or just take our word for it and click the image of this Seaflo Pump that we highly recommend.
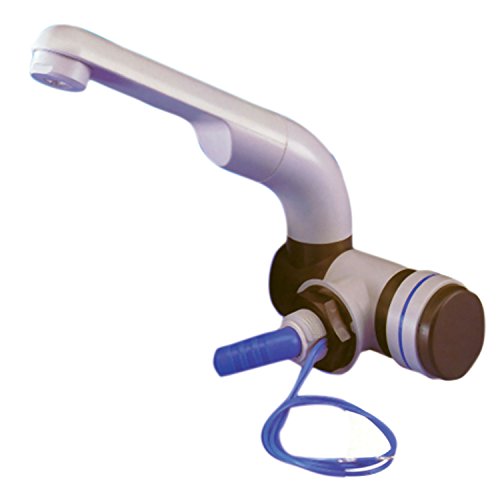
Where can I find an “On Demand” Water Pump?: - In truth, they are all sort of “on demand” as they should shut off once the line is pressurized. (If they don't, you have a leak.) If you’re looking for a Faucet that switches your Water Pump on and off, you want something like the one shown. Click the image to compare.

Can I just use a Manual Pump?: - Yes. Absolutely! We'll call this a “Self Service” Water System. Manual pumps work one of two ways. They either pressurize the entire system (just like tapping a keg of beer), or they “pull” water from the line as you pump. In either event you'd likely want to keep this setup small and simple. You'd probably lose the City Water Hookup and the Water Heater, so you'll be heating water on the stove for your bath. Although, a Solar Shower presents a really interesting option here.

Do I have to have an Accumulator?: - No, but it’s a good idea. An Accumulator essentially “balances” the flow of water and can reduce the number of times the Water Pump cycles, thus increasing pump life and reducing power use. – All of the Pumps we feature on the Water Page will all run just fine without one, but if you find that your system is “pulsing” or your pump continually turns on and off, an Accumulator will likely resolve the issue. For no more than they cost, it doesn’t hurt to install one from the start.
Tech Tip: - An outdoor Spigot is incredibly useful. Simply mounting this lower than your Fresh Water tank would make it gravity-fed (a great help with a Manual Pump system), but if you've got a City Water line you would want to install it after the 2 lines join (off the Main Water Line).
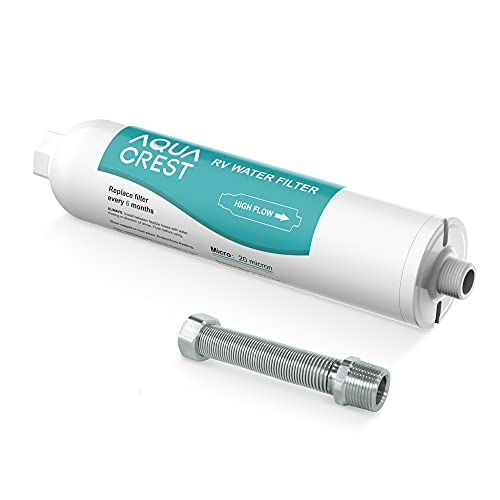
Do I need an Inline RV Water Filter:? - Not necessarily, but you can never be sure of the water quality you'll get filling up at multiple locations, so it isn't a bad idea. The same argument for a Pre-Filter (particulates in your Fresh Water Tank) apply, but if your goal is simply drinking water purification, you don't really need it for the Shower or Laundry. A Counter-Top or Tap-Mounted Drinking Water Filter (as shown on The Water Page) will accomplish this. If you go with a hidden, in-line Filter, just remember that you'll be changing the filter regularly, so keep it where you can reach it.
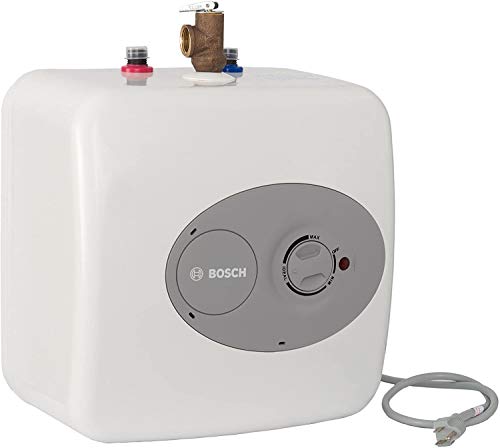
What Water Heater should I use for my Bus Conversion?: - With so many options, Tank, Tankless, On Demand, even Solar… This may be decided more on your Build Design and personal preference than anything else. Our Choices for each category are shown about 1/3 down on the Water Page, but we personally use the Bosch Mini Electric. Bear in mind that you will use less water, and take shorter showers once you're on The Road.
RV Toilet, RV Shower, RV Washer Dryer, etc.: - The discussion about toilets is an entire Blog in itself. - Stay Tuned-. If you are on the fence about a Composting Toilet, we'd advise just going with a Cassette Style, or even a 5-gallon bucket with a seat until you make the call. If it's more of a financial decision, check back often as we will be doing a Blog on a DIY Composter that will save some money over a brand name. - Note: Black Water systems aren't very popular in Skoolie or Vanlife, and with good reason.
What Fixtures you choose comes down to your personal taste and style more than mechanical application. Please check The Water Page for some options and our recommendations.
As with your Solar Setup, be sure you include Water System Elements and Plumbing when you do your final Design. The most space consuming part will be The Fresh Water Storage Tank, potentially followed by the Water Heater, so check for those measurements online if you can't buy the items before you start.
Quick Links:
Start The Engine - Establishing a Budget - Making a Living on The Road - Choosing a Rig - Do I Need A CDL? - Designing a Skoolie Build - Step By Step Build Order - Skoolie Toolbox - Doing a Build On The Cheap - 10 Tips to Save Power and Money - Skoolie Build Ideas - Solar 101 - “Inverter/Charger/Switch” or 3 Separate Devices - Simple Solar - Solar Cheat Sheet - Step by Step Solar - Water Setup - Propane Setup - Skoolie, Van, & RV Air Conditioning DE_Mystified! - Skoolie Heating - Insulation - Digital Nomad Connectivity - Choosing a Domicile State - Converting a Commercial Title - Van, Skoolie, and RV Insurance - Camping Clubs, Subscriptions, and Passes - Road-Skool / Home-School - The Simple Skoolie Kitchen
Jump To Page:
Home - Tutorials - Solar - Cooking - Refrigeration - Water - HVAC - Tech - RV Accessories - Gear - Swag.