

Use this Tutorial in concert with the HVAC/Parts Page to check Appliances and additional Fittings.
Warning / Disclaimer: Your Propane System will have far fewer safeguards than your Solar Power System. While your Electrical System can start a fire, a Breaker should automatically shut it off. A gas leak can easily go undetected, and it will keep right on leaking until you find and fix it. - Additionally, it can kill you. - This is why every blog or video you see on the topic will say, “Vent, vent, and vent some more”. Not only can your Propane Holding Tank leak, but every connection in your Rig, every split, everywhere it hooks up to an appliance, and possibly even the lines themselves can potentially leak as well. These leaks can develop and worsen over time.
Once again, we are not engineers, but this is an area in which you can not be too safe. We will give you some suggestions on what items to use and different ways of installing them, but if you find yourself lost, confused, or scared, do not hesitate to call a Professional.
That being said, there is much less “math” involved in designing and installing a Skoolie Propane System. Putting Propane in your Van or RV is a task well within the grasp of anyone with some decent DIY skill. (Just be sure to check, and double check, for leaks before you hit The Road.)
Since we don't have many Propane Components listed elsewhere on the site, click on the images below to review current pricing, start budgeting for your build, and start shopping when you’re ready.
How Much Propane Does a Skoolie Use?: - As with water and power, how much or how little Propane you use is entirely up to you. There are some who use just a Portable Camp Stove, and others who have a full Cook-Top and/or Gas Oven. Many Full Time Nomads heat water with Propane, but Electric (And Solar) options are available. Heating an RV Living Space is often where people use the greatest amount of L.P., but Wood is an alternative. You could even fire up the engine for 10-15 minutes at a time and use the on-board Heater, or just go with a combination of Body Heat and traveling South for Winter, and North for Summer. ;)
Very rarely, these days, people might run a Propane Fridge or other appliance, but they are becoming less and less popular and, frankly, they're not a good choice in our opinion, for safety or efficiency.
Can I Start Small and Scale Up?: - You can, but if you know for sure that you are going to eventually want a Gas Water Heater, Full RV Oven, or plan to use Propane Heat, it will be much easier to “Plumb” those into your initial Build than it will be to try to add them later. If you find that you don't need or rarely use the appliances, disconnecting and/or removing the lines shouldn't be overly complicated.
Tech Tip: Take some time to consider alternatives to Propane. It is a “consumable”, meaning that you will continually need to replenish your supply. It is also a finite resource. There’s only so much of it. While Propane is currently plentiful and relatively inexpensive, that can (and will) fluctuate. The expense will add up over time. - For the cost of a Full RV Propane Setup you could add Solar panels, a Battery, and upgrade your Inverter. Which leads us to:
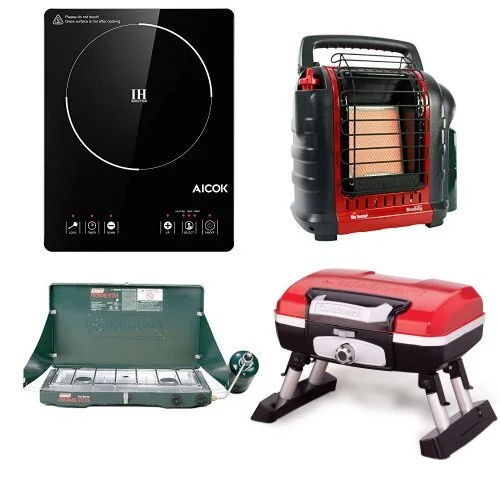
Check the Cooking Page for links to the Coleman Stove, Induction Cook-Top, and Gas Grill.
Our Recommendation: - Don't install a Propane System at all. No, Really... With the relatively low cost and and moderate Power Drain of an Induction Cook-Top and an Electric On Demand Water Heater (Or Solar), the cost of beefing up your Solar Power Setup could pay for itself in short order. You're already building an Electrical System in Your Rig, and, once it’s complete, you’re generating that power for “free”. If the batteries run low, you can recharge them with the engine or a generator in case of emergency. (See our Solar Setup Blog for more info.) This especially applies if you’re going to regularly be connected to Shore Power.
Bring along a Camp Stove, Portable Grill, and a Buddy Heater for backup, and run them off of a small tank or 1 Pound Bottles.

Check the gadget here for refilling one pound bottles from larger tanks to save some money!
When you consider the added Time, Effort, and Expense of doing a Full Propane Setup, even a modest one, to say nothing of your Personal Carbon Footprint, and Safety, we say, “Do Without.”
Some people simply prefer cooking with gas, and there is nothing wrong with that. If you plan to make three full, family meals a day, really like to bake, spend a lot of time in cold climates, or just can't give up those long luxurious showers, a Propane-Free Skoolie probably won't work for you. (Though, there is a solution to the Shower thing on our Water Setup Blog.) If that’s you, please read on.
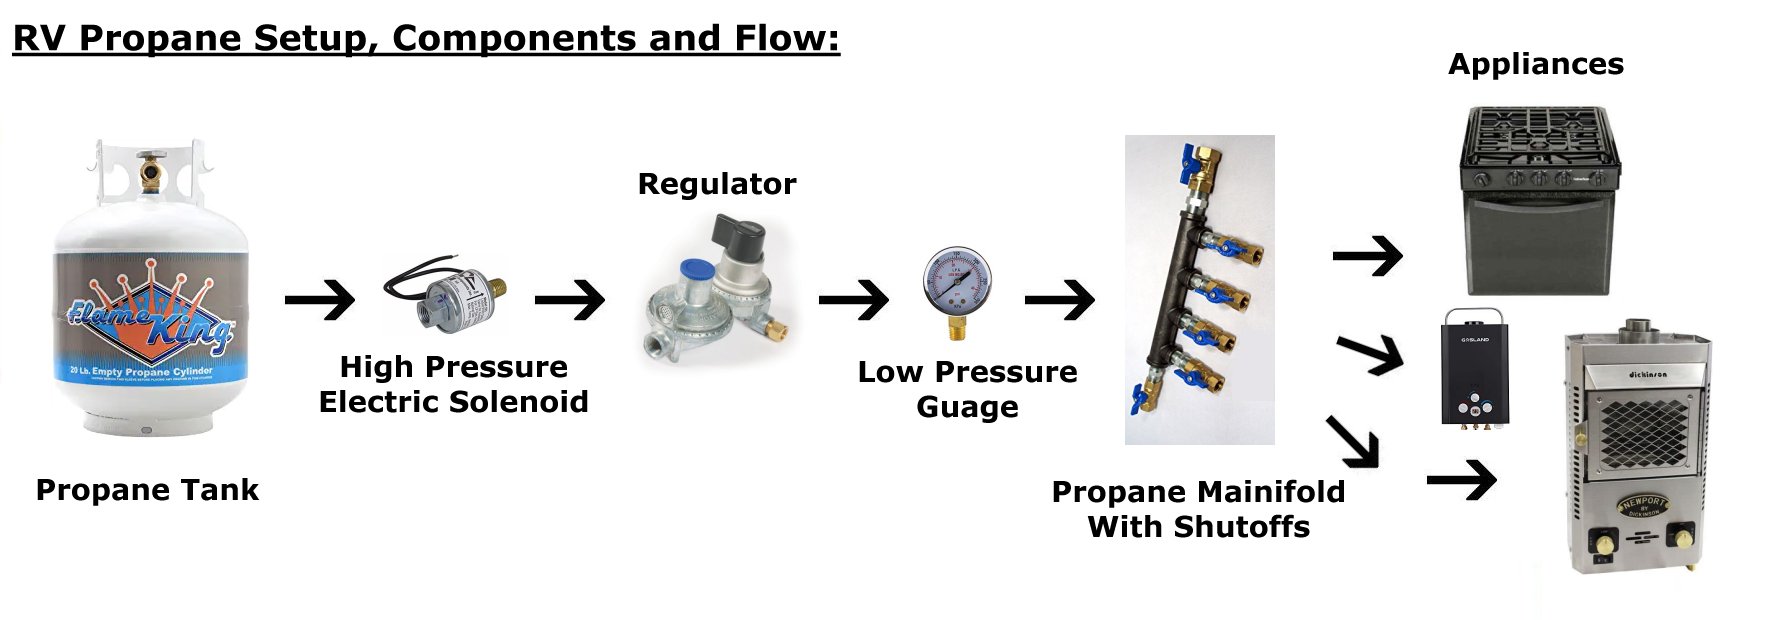
How does it all go together?: - An RV Propane Setup is literally straightforward, since it only flows one way, and the output doesn't have to be adjusted up or down after the regulator. The Chart Below should be relatively self-explanatory.
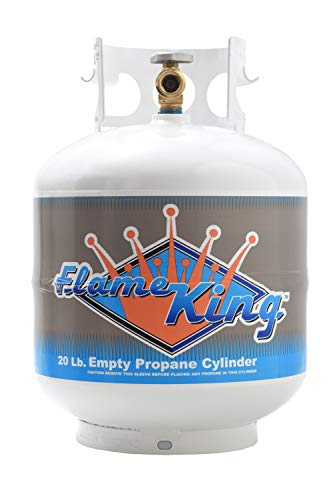
What Type of Propane Tank is best for a Van?: - While a large, permanently mounted tank is common to have in a Class-A RV, or for a family that is heavy on Propane Usage, most people go with a Portable Propane Tank (5, 11, or 20 pound) like you would commonly find under a Gas Grill (BBQ). The advantage is that they are relatively light weight, easy to refill, and can even be “swapped” for a full tank (also called a “bottle”) at just about any hardware store. Steel is the most common construction, but they can also be found in Aluminum (not always available for trade), and we've even heard of Fiberglass or Composite.

Mounting Propane Tanks on a Skoolie: - Most Importantly: Mount them outside if at all possible. Safety is the first concern, but in certain areas it's actually illegal to have a propane tank mounted inside a living (or RV) space. At very least, your tanks must be “accessible” from the outside (separate door). Vanlife Nomads will have the most difficulty with this, but please explore every option. There are lots of ideas on YouTube for mounting brackets, sliders, or “Propane Lockers”, but the key is to have as much ventilation as you can. A Dual Rack Mount will allow to keep your backup Bottle ready to switch over instantly.
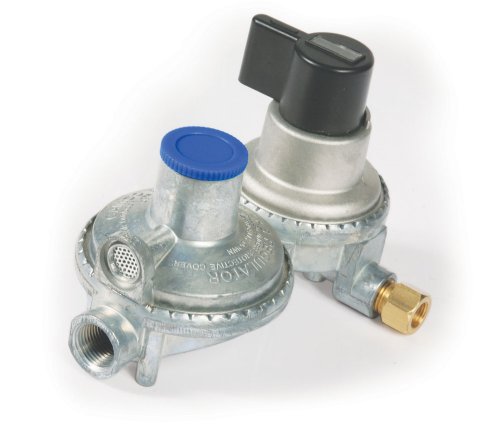
Do I need a Regulator?: - Yes. A Propane Tank will put out far more pressure than you need (or want) and will cause serious damage, injury, or fire without one. Additionally, since Propane expands or contracts due to heat and elevation, the output pressure fluctuates as well. A Regulator will maintain the pressure in your line to 11 W.C. (“Water Column”, the typical way Propane Pressure is measured), which is equal to roughly .4 psi. Anything that runs on Propane or natural gas, including the meter on your house and the BBQ on your patio, comes with an on board Regulator. They come in “1-Stage” and “2-Stage”, with 2-Stage being the better choice, and providing a more steady flow. You can use a 1-Stage Regulator to save space, but some appliances require a 2-Stage Regulator to operate properly.

How do I turn my RV Propane Tank On and Off?: - Your Tank might be inconvenient to access from inside, so it's common to add an Electric Switch (Solenoid) that you can flip on or off whenever needed. It can be mounted inside the house for convenience. You can connect it via a button or switch with an LED indicator and see at any time if you happened to leave it on. Obviously, you should turn off the gas whenever not in use, and you're free to go out and manually turn the knob, or install a manual shutoff, but since the power draw on a Solenoid (even one with an LED) is minimal, it is money well spent!
Note, Most Solenoids are designed to run on the “Low Pressure” side (after the regulator), though prevailing thought is that a “High Pressure” Switch (before the Regulator) is a better option. *If you use your Regulator to switch between Tanks, you’ll have to use a Low Pressure Solenoid (after).

Should I install a Pressure Gauge?: - Yes. Not only will this let you monitor Pressure at a glance but will also warn you of potential leaks and/or if your Regulator is performing incorrectly.

Distributing Propane to Multiple Appliances: - The best answer here is to use a “Propane Manifold”. This will not only give you more flexibility to add or remove lines, but provides a single spot for shutoff valves to each Appliance. You can, of course, just “Split” the line with multiple fittings, but since you're going to be adding individual shutoff valves anyway (and you are) this keeps it simple and organized.
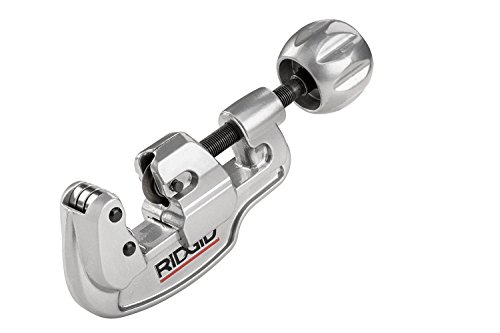
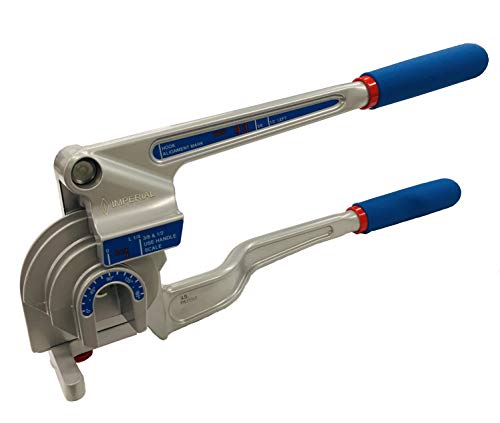
What Type of Connecting Lines are Best For RV Propane?: - The honest answer is “Copper”. If you've never worked with copper tubing it might be intimidating, but it's actually easier than it looks. With the right tools (a Tubing Cutter, Tubing Bender, and a Flare Tool - Click Below), you’ll make short work of it. - You can check the forums for arguments on “Black Pipe” and “Rubber Lines”, and they're certainly an option, but Copper has the advantage in just about every category.

Note that the Manifold, shown above, is “Black Pipe”. Since you will be turning the valves and potentially using a disconnect, this, more sturdy, option would be best. Connect to Copper via the valve or with an adapter.
Connectors and Valves: - The main point to make is that all Propane Connectors are “Flare” Connectors (hence the Flare Tool mentioned above). This creates a tight seal. Using a Quick Disconnect for the tank is a great convenience, and be sure to install a shutoff valve before each appliance as well for maintenance and in case of replacement. Click the images below for pricing information and to compare.


Checking for Leaks: - Before you fire up the ol' oven and bake some bread, be sure you check Every Connection by spraying it with soap and water (mix it up in a spray bottle roughly 1:4). If you see bubbles, check the fitting and tighten as necessary. (Check the Flare on the pipe if this doesn’t work.)
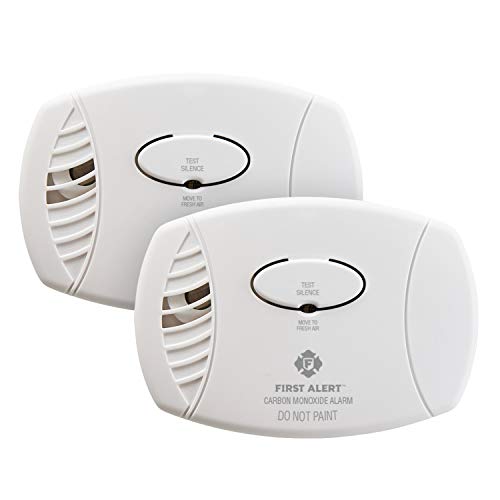
Safety First!: - It’s a good idea to have a CO Detector (or 2) in your Build regardless of propane use. Click the image to check them out. - More options available on the HVAC Page.
A Final word on “Freezing”: - Liquid Propane is very cold. It is common for the tanks (or even lines) to freeze in extreme cold or high elevation. Prolonged use (or cold) can even cause the Ball Valve inside the bottle to seize. The easiest remedy is to switch from one tank to another when you notice heavy condensation or frost. This allows “Bottle A” to warm up while “Bottle B” is in use.
Quick Links:
Start The Engine - Establishing a Budget - Making a Living on The Road - Choosing a Rig - Do I Need A CDL? - Designing a Skoolie Build - Step By Step Build Order - Skoolie Toolbox - Doing a Build On The Cheap - 10 Tips to Save Power and Money - Skoolie Build Ideas - Solar 101 - “Inverter/Charger/Switch” or 3 Separate Devices - Simple Solar - Solar Cheat Sheet - Step by Step Solar - Water Setup - Propane Setup - Skoolie, Van, & RV Air Conditioning DE_Mystified! - Skoolie Heating - Insulation - Digital Nomad Connectivity - Choosing a Domicile State - Converting a Commercial Title - Van, Skoolie, and RV Insurance - Camping Clubs, Subscriptions, and Passes - Road-Skool / Home-School - The Simple Skoolie Kitchen
Jump To Page:
Home - Tutorials - Solar - Cooking - Refrigeration - Water - HVAC - Tech - RV Accessories - Gear - Swag.