
Updated 1/24/2022

With so many options and variables in Solar Power it can be confusing and overwhelming, as well as likely the most expensive part of your Build. - This Tutorial has two purposes. - It is designed to show the order in which you should hook everything up, as well as demonstrate options for doing a Solar Installation “one step at a time”. Additionally, we are trying to make it as simple as possible. Once you’ve settled on sizes and components this should help ease the stress of putting it all together.
Solar One Step at a Time: By now you’ve seen tons of charts and calculators, and trying to envision how all of that ties together is “difficult” to say the least. (It was for all of us… It’s okay.) - Even if you have a perfectly good understanding of all the finite details and how it all works, you might not have thousands of dollars to spend on doing an entire Solar Setup all at once. - That’s okay too. The good news is that you don’t really have to. - You can start with the House Wiring and Shore Power, then add additional Solar Elements as you go.
Whether for budgetary reasons, or simply because doing so makes it all easier to understand, Installing one system at a time, or one element at a time, is actually a sound choice, and allows you to check your work along the way.
We’re going to go through the products needed, and the order in which you can install them to build your House Electrical / Solar System piece by piece. - We’ll start with a way to power your Rig’s 120 Volt Systems via Shore Power or a Generator (plugged in to an outside source), then we’ll add Batteries, an Inverter, Shore Power Charging, Engine Charging, and finally Solar Panels and a Charge Controller. - We’ll go easy on the math, and not go into great technical detail. Be sure to check out our Solar Cheat Sheet and Solar 101 Tutorials for reference.
Note: This is not the order in which most videos and Tutorials explain Solar Setups. They typically start with the Panels and Charge Controller, then go through the system the same way the power runs. However, when hooking up Solar, it makes more sense to “start at the end and work backwards” (as shown here) even if you’re going with a full Setup all at once.
Step 1: Interior Wiring and Shore Power
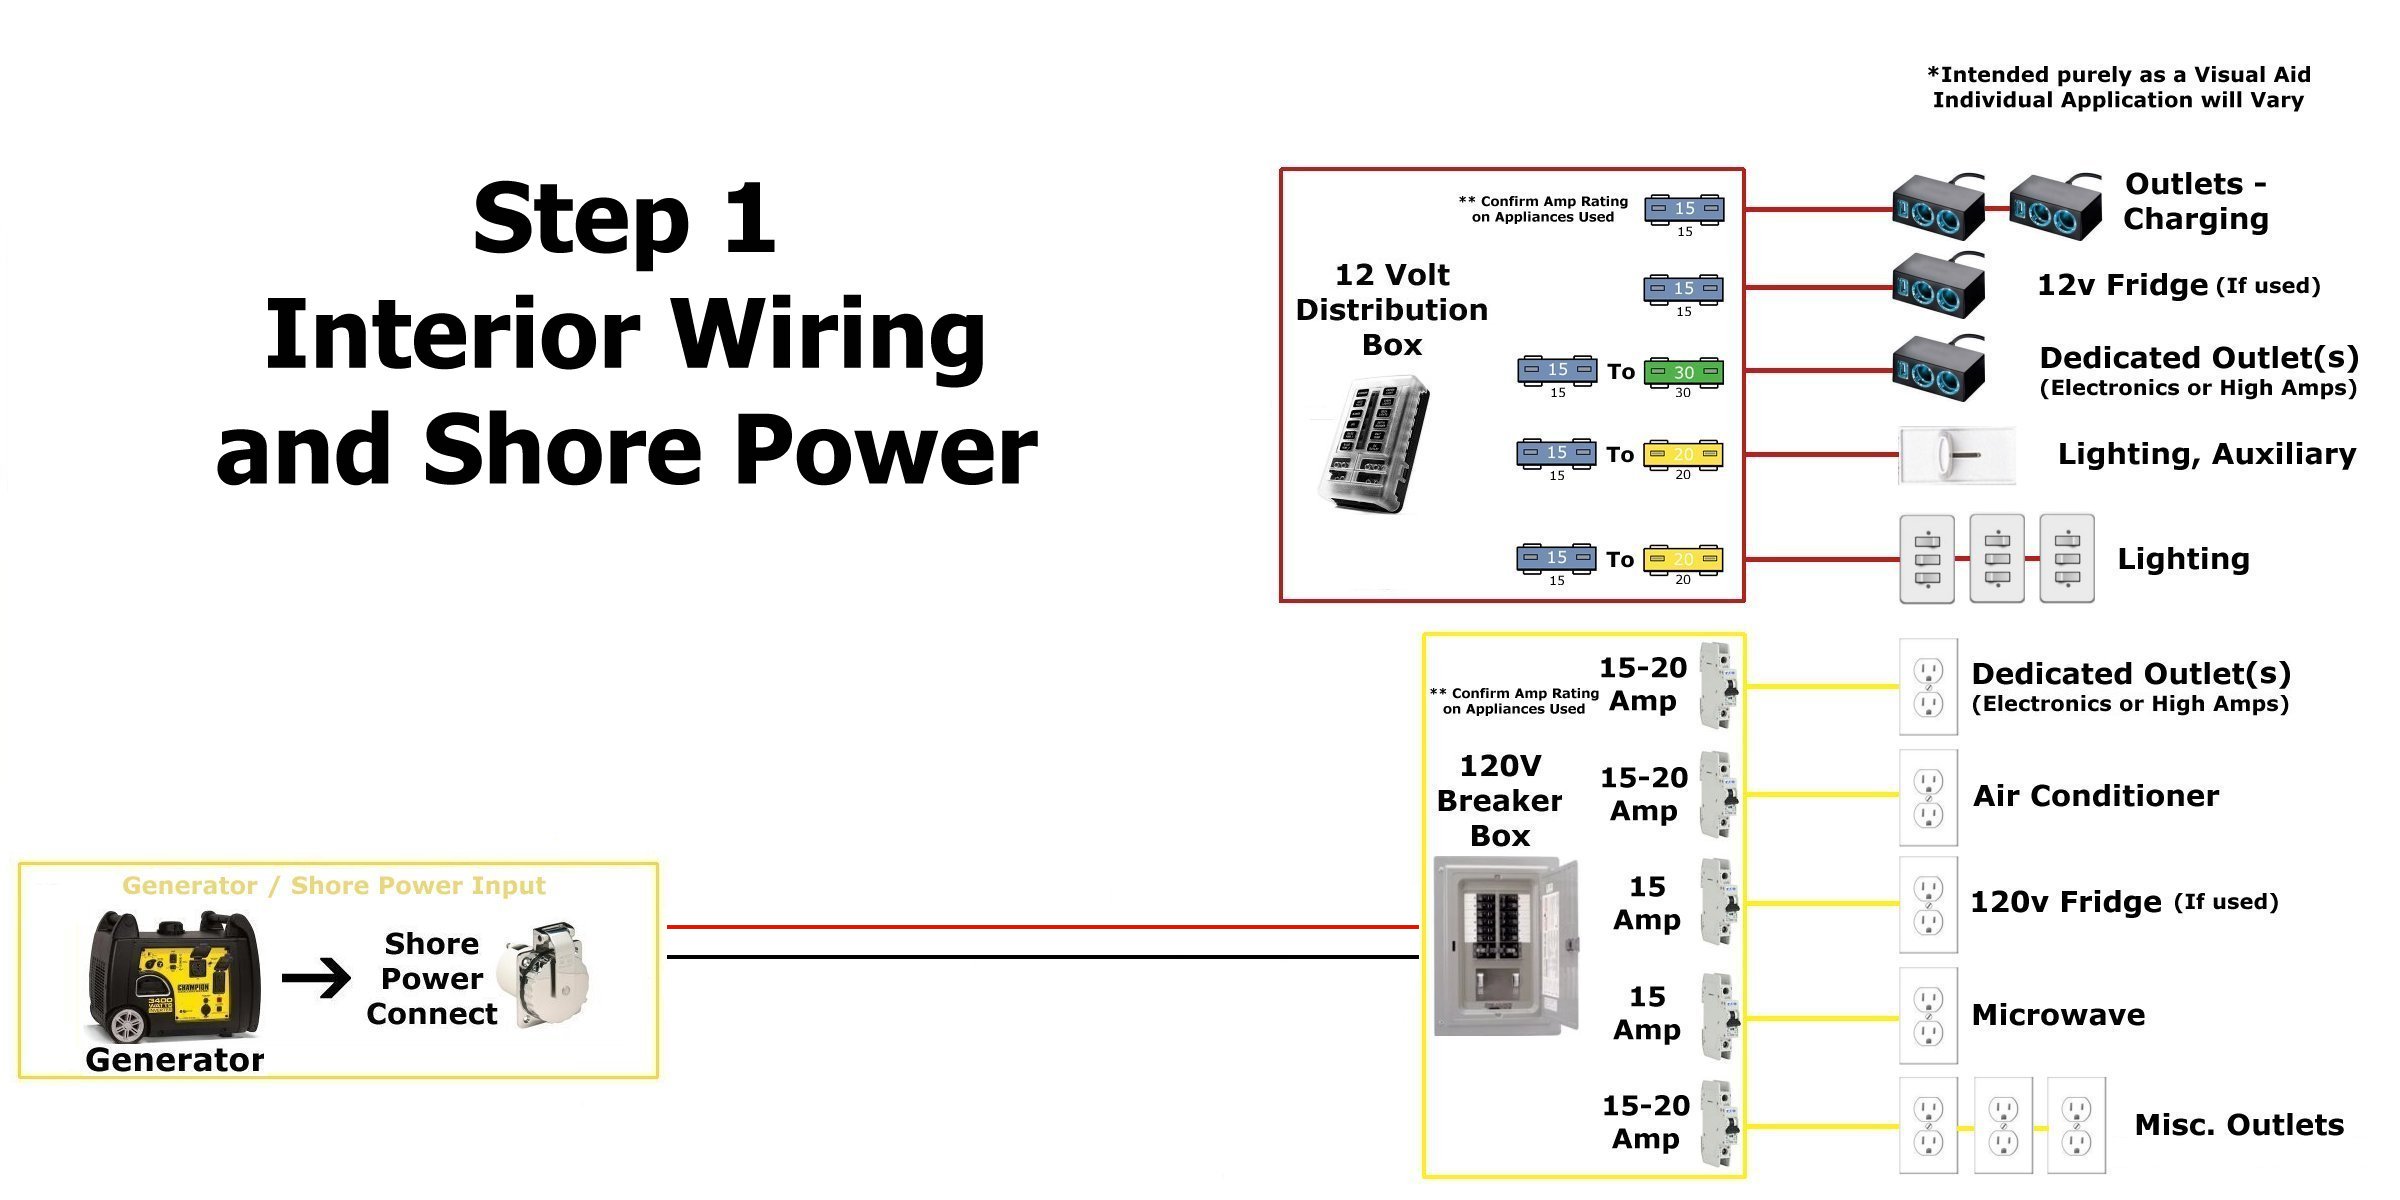
Interior Wiring Breaker Box, Fuse Block: - You’re going to have 2 systems, 12v and 120v. You will need a Distribution panel for each. A 120v Breaker Box (similar to the one in your house) and a 12v Fuse Block (similar to the one in your car).
Start with deciding where the outlets and switches for each system will go (12v and 120v). Run wire for all of the lights, switches and outlets, connecting them to the appropriate distribution panel (Fuse Block or Breaker Box). - Your 12v system won’t be connected yet, but you can temporarily tie it into the car battery to make sure it all works. - For the 120v system you can use an extension cord and a multi-meter to double-check your outlets and breakers.
Note: The Breaker and Fuse distribution shown in the chart are “suggestions” for the point of this Tutorial. Your individual application will vary, but as a general rule you want to dedicate a “line” (Breaker or Fuse) to items that draw the most power, or run continuously. Use the “PIE” Equation from the Solar 101 Tutorial to calculate what size Breakers or Fuses you need.
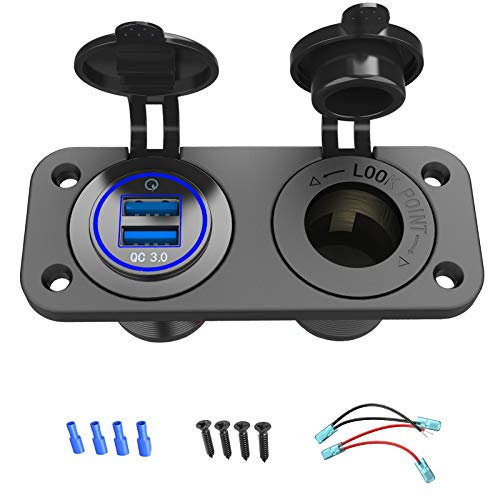
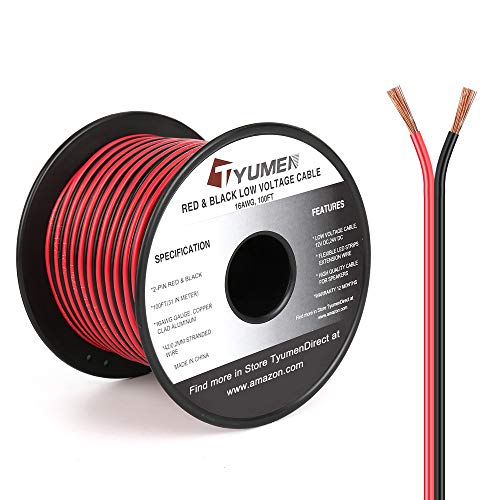
Here are some links to 12v outlets, switches, and a 12v Fuse Block, as well as a 120v Breaker Box that will work for your Build. - The types of wire you will need are included as well. (You can pick up your 120v outlets locally.)


Generator Outputs
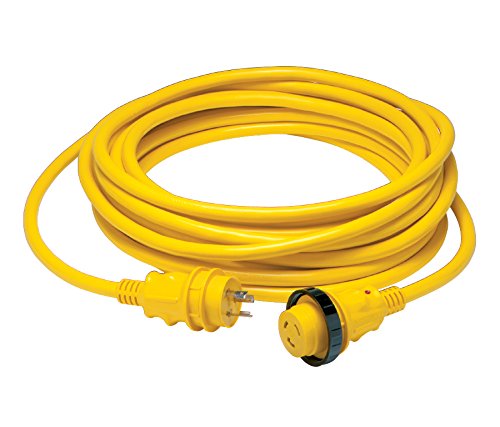
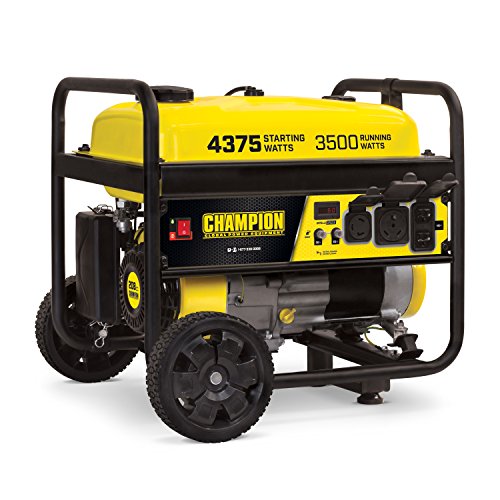
Shore Power / Generator: - You need a “port” or “Inlet” for outside power. This can be Shore or your Generator. - You can use the same plug for each. Simply plug your generator into your Shore Power connection when in use (You won’t use both at the same time.) - Be sure you get a Generator with a 30 amp Outlet (see image).
In most cases a 30 amp Connection is more than enough. With the appropriate adapter you can use your 30 amp Shore power Connection with a standard 15/20 amp extension cord (click here).
Below are links to a Shore Power Connection, 30 amp Shore Connect Cable, and a good Generator with a 30 amp outlet. Click to compare. More options are available on the Solar Page.

Options for 50 amp Shore Connections are available on the Solar Page. We discuss sizing of Shore Power Connections in depth in the Solar Cheat Sheet.
Once you have installed the above you can run your 120v system from Shore or the Generator.
Step 2: Adding House Batteries
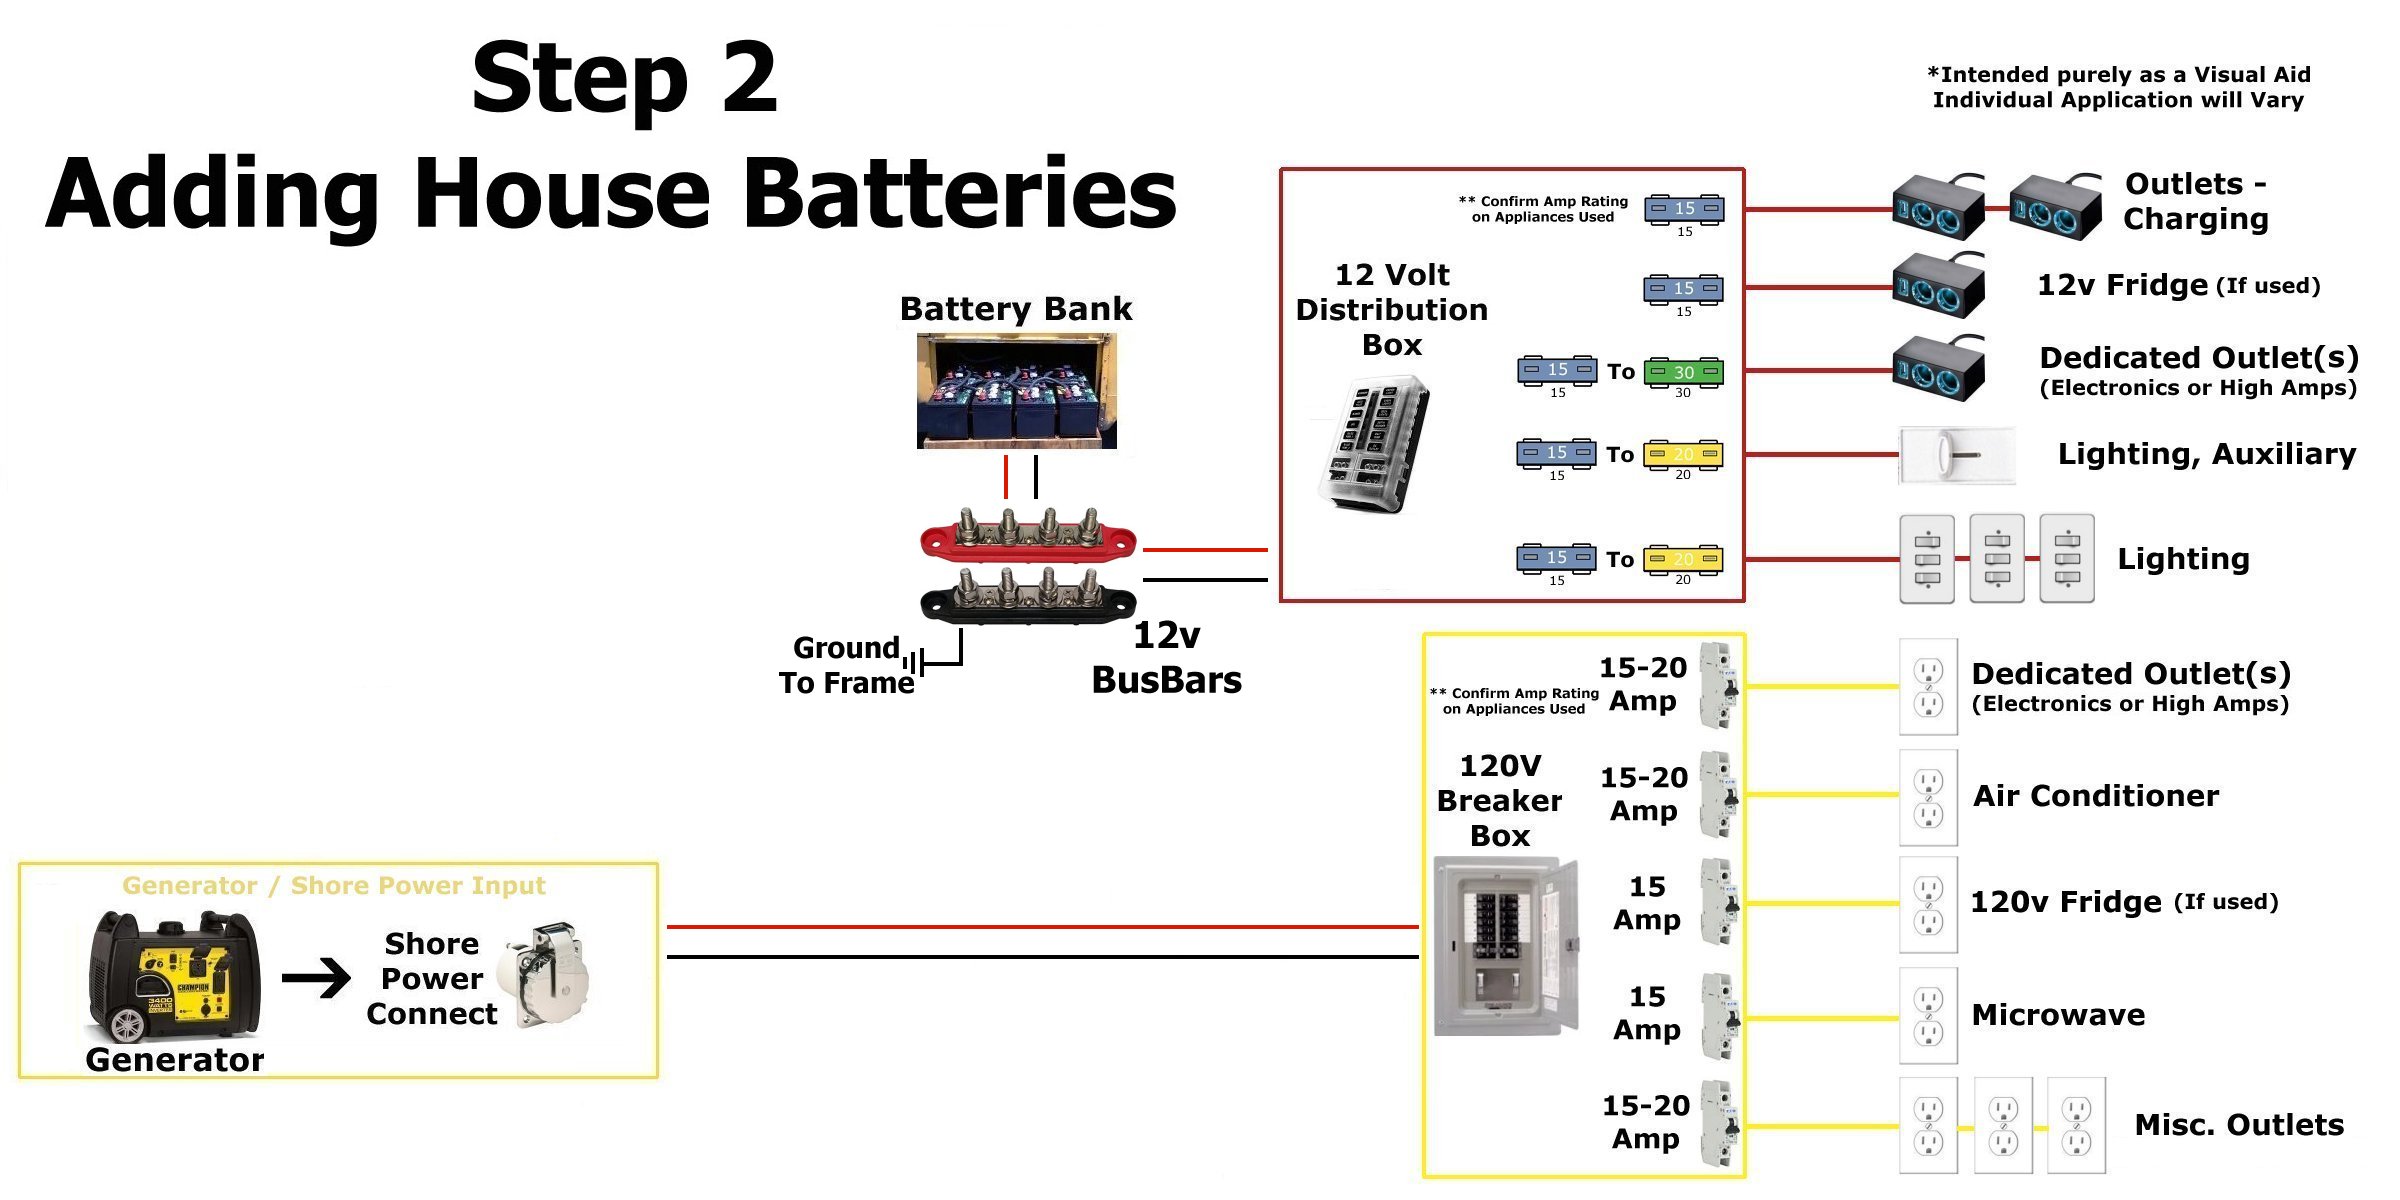
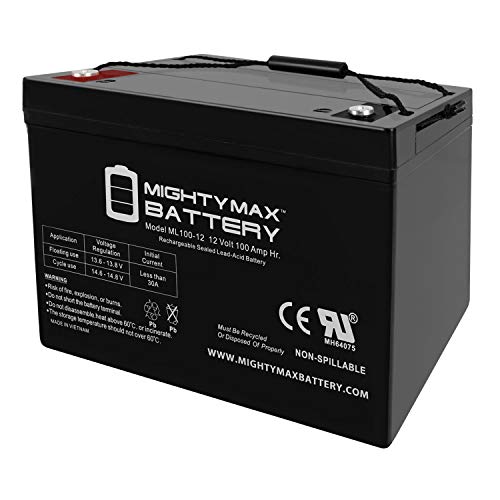
Batteries: - While you technically can run 12v appliances and lights from the “Car Battery” and the cigarette lighter, it isn’t really designed for that type of use and will not last long. You’ll be setting up a Solar Battery Bank, using Deep Cycle Batteries.

It’s a good idea to use BusBars or Power Couplings, both for ease of installation and any future maintenance. *Note: Only connect 12v power to the BusBars, and be sure to Ground to the frame. See The Solar Cheat Sheet for more info.
**To keep the charts simplistic we show the Positive (red) and Negative (black) lines going to the BusBars as a group. - To be clear: Positive always connects to the Red BusBar, and Negative always connects to the Black BusBar.
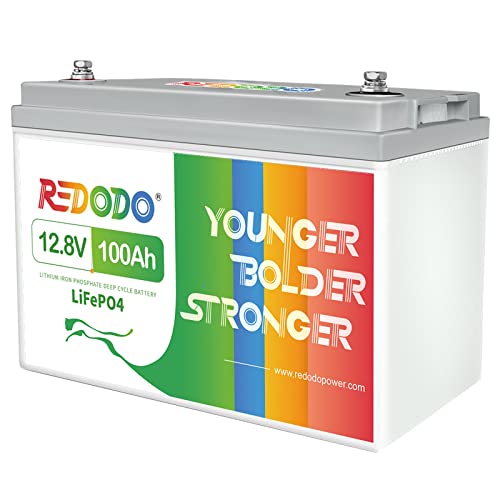
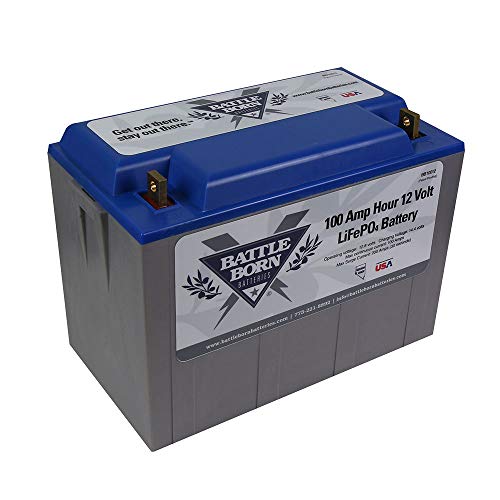
The simple answer is that Lithium Batteries are the best choice, for various reasons. Go with that if you can afford it. - They are also the most expensive choice. - Here are some links to lithium options and and an AGM you might consider if you’re on a tight budget. (more on the Solar Page)
At this point you need to decide if you are going with a 12v, 24v, or 48v charging system. (See the Solar 101 Tutorial for info). Basically, if you have 800w or less in total Solar Panels on the roof, start with 12v. It’s relatively easy to change later if need be. - If you haven’t done so yet, see the Solar Cheat Sheet for the simple answer on sizing your system.
Once your Battery Bank is installed and connected to your 12v Fuse Block you can run your 12v appliances from the “House Batteries”.
Step 3: Inverter, Shore, Generator, and Engine Charging
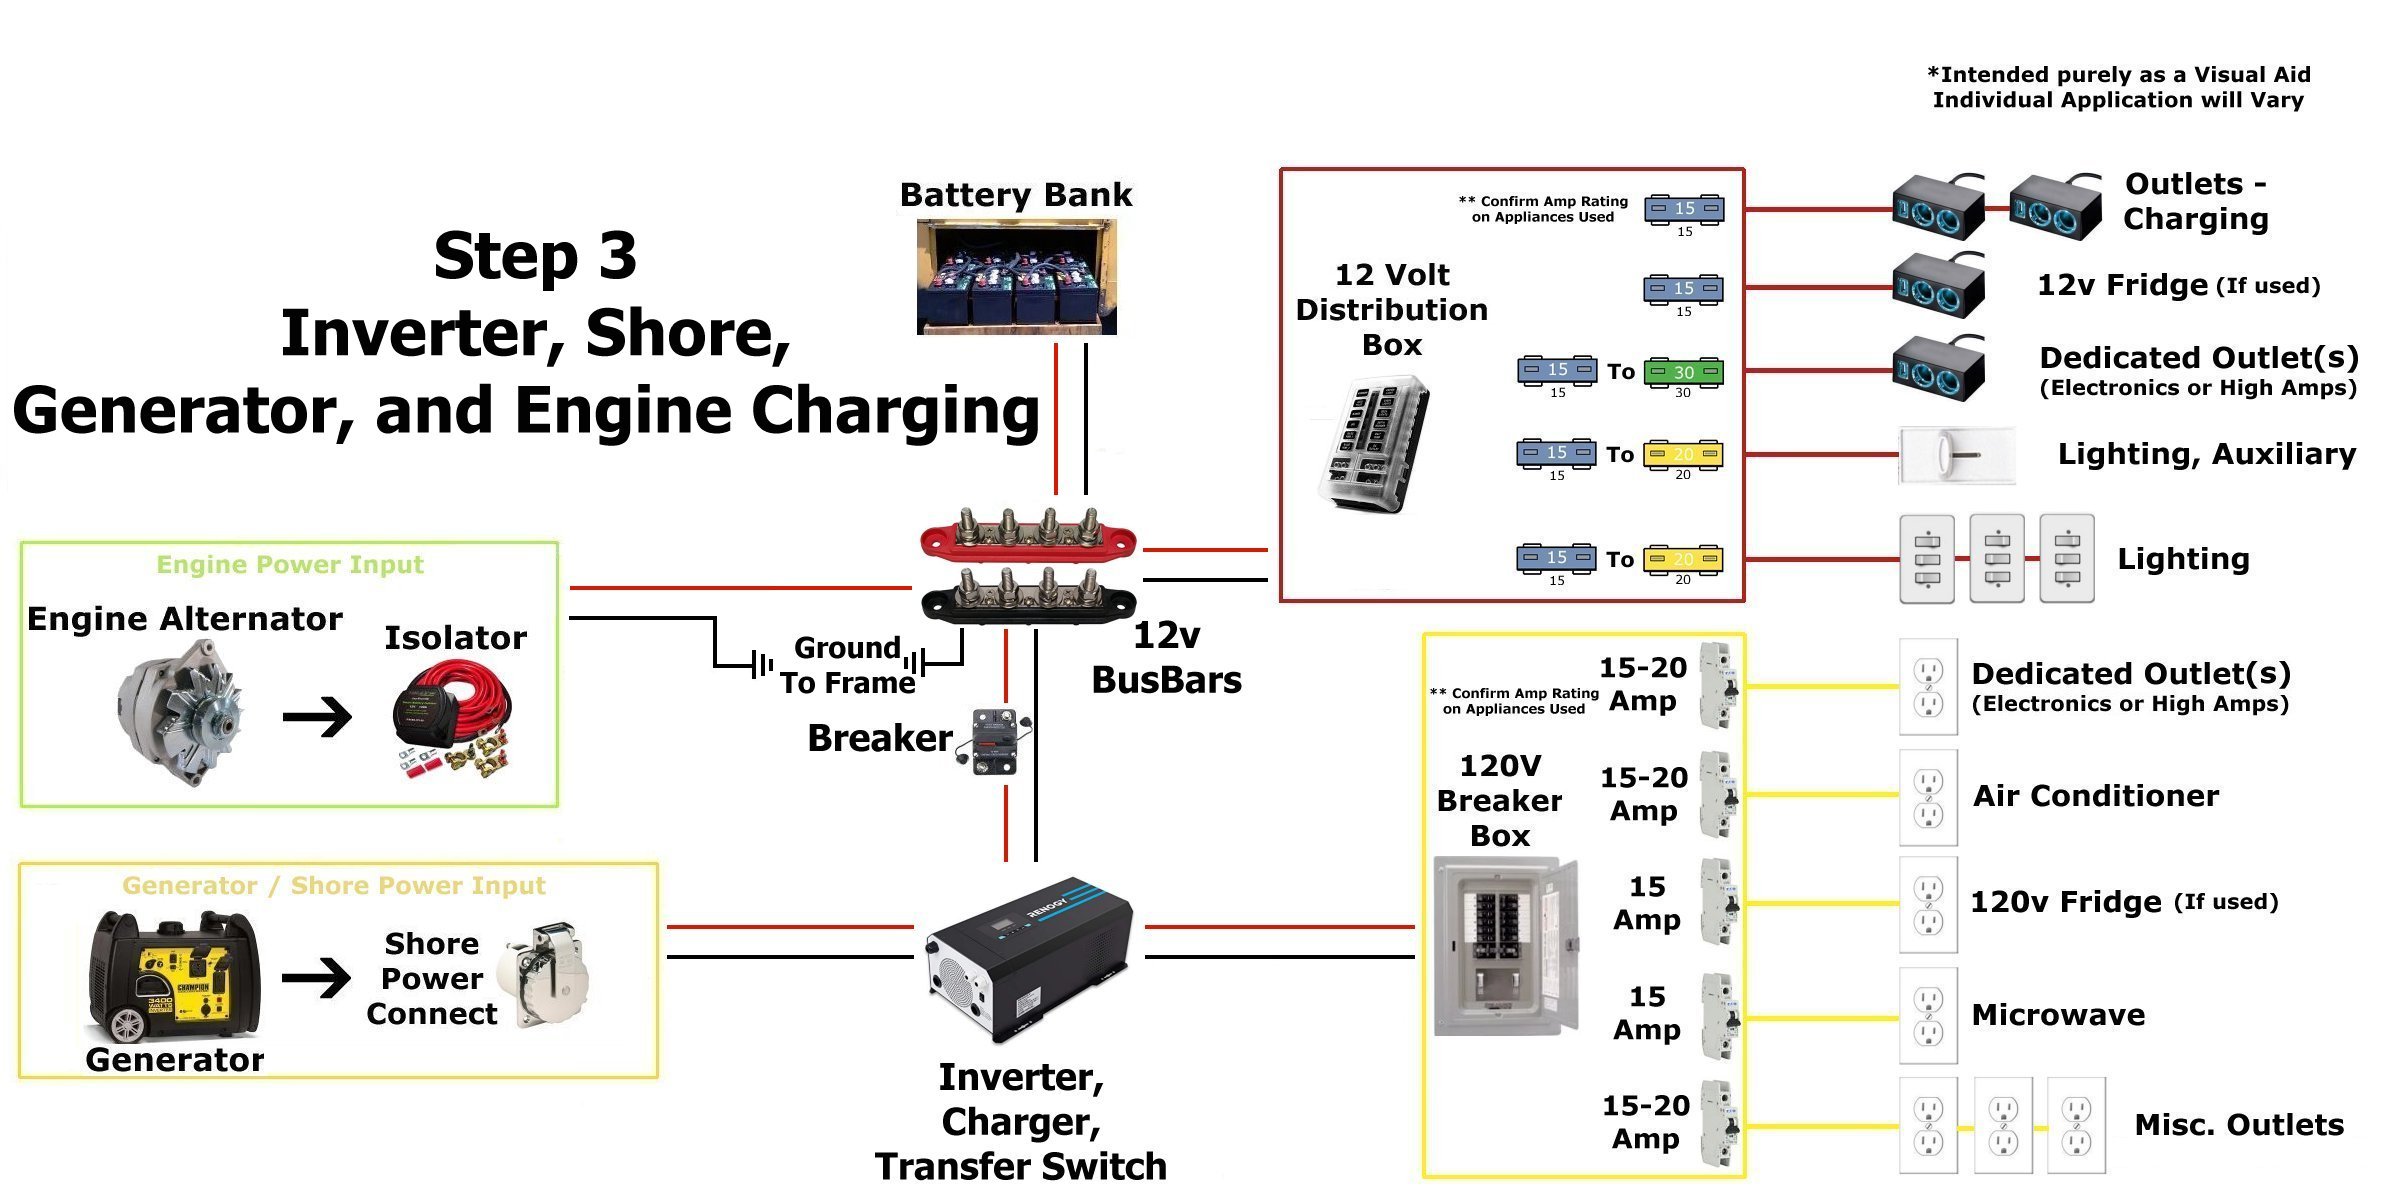
Once your Batteries are up and running you’ll need a way to recharge them. - In addition to Solar Panels, there are two main ways to charge your Battery Bank. A Smart Charger will allow you to utilize Shore Power or a Generator, and an Isolator Switch will tap into the charging function of your engine.
Tech Tip: In an effort to keep this short, sweet, and easy to follow we are showing the most basic setup needed. Depending on the size of your system (or personal preference) you may want to include additional Breakers or Disconnect Switches between the Batteries and the BusBars, The Isolator and BusBars, and Between the Shore Power Connection and Inverter. Take a look at the Solar Cheat Sheet for a chart, sizing info, and links to additional items you might want to include.
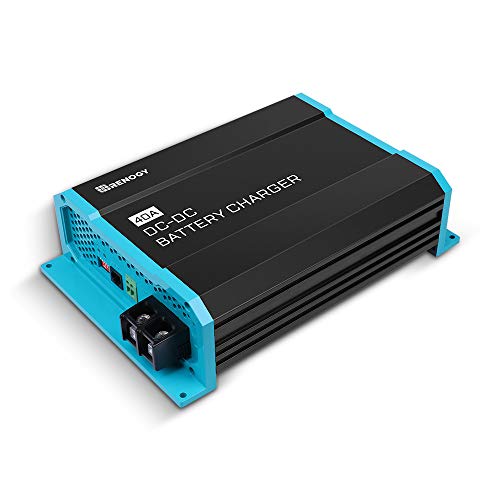
Engine Charging: Engine Charging is the next step, giving you an inexpensive way to recharge batteries while driving. - For those on a budget, an Isolator Switch will work well with older Rigs and Low-End Batteries, but if you are going with Lithium and/or have a newer (2015 +) “Smart Alternator” you’ll want to use a DC to DC Charger. If are unsure what Alternator you have or the amperage it puts out, play it safe and go with a DC to DC Charger. (An Isolator Switch could actually damage the system.) - Be sure you check the Engine Charging section of the Solar 101 or Cheat Sheet Tutorials for more info.

Inverter, Charger, Transfer Switch: - Many people recommend 3 different stand-alone devices for this.- Have a look at the Solar Cheat Sheet if you’d prefer to get each item individually (there are arguable advantages). - If you’re looking to simplify the process, however, or if you’re tight on space, it makes more sense to buy an “All-In-One” Inverter/Charger/Switch such as the Renogy shown below.
Have a look at This Tutorial for a more in-depth comparison between using 3 separate devices and “All-In-One” units.
Click Here for an alternate wiring chart showing a separate Inverter, Smart Charger, and Automatic Transfer Switch.
Click on the Image below to link to amazon, and watch the Video on how to connect this Renogy all in one. - It’s about as simple as it gets.

More Inverter, Charger, and Transfer Switch options are available on the Solar Page.
At this point you have all you need to run your full system, short of Solar Charging. - You can run your 12v System via the House Batteries, your 120v System from Battery or Shore Power, and recharge Batteries from Shore or via the Engine.
Step 4: Adding Solar Charging
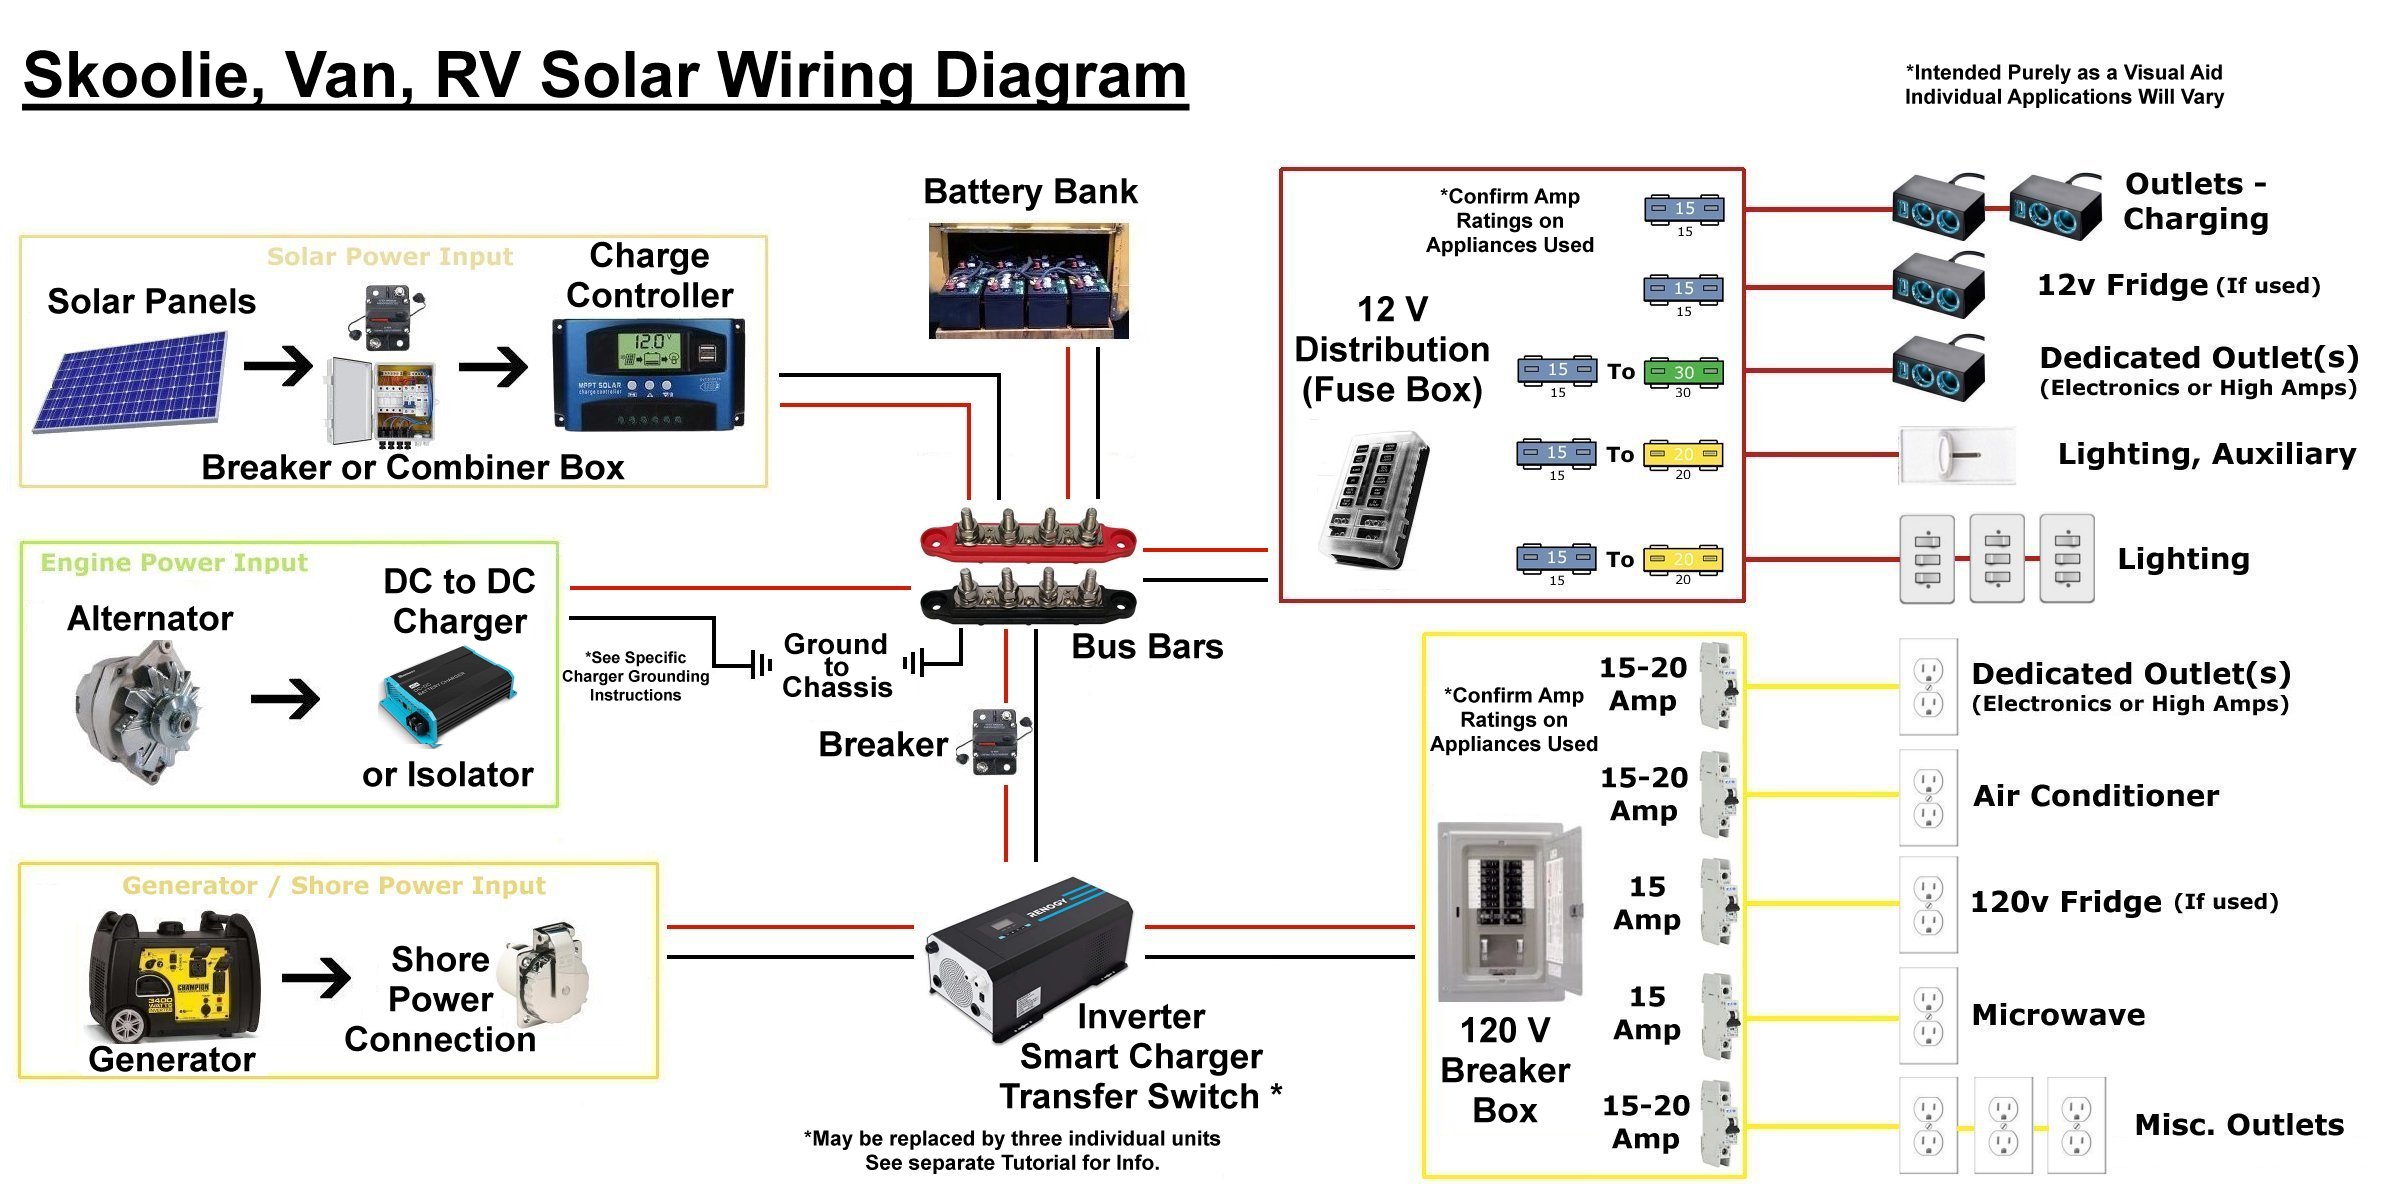
Charge Controller: - In short, you’ll want an MPPT Charge Controller equal to 10% of the total wattage of your solar array.* - The math is available in the Solar 101 Tutorial, and more Charge Controllers are listed on the Solar Page.
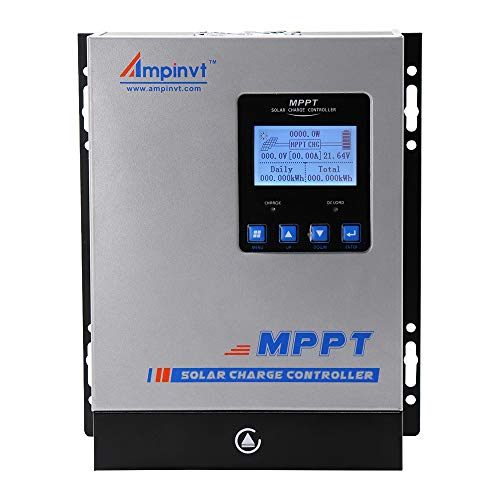
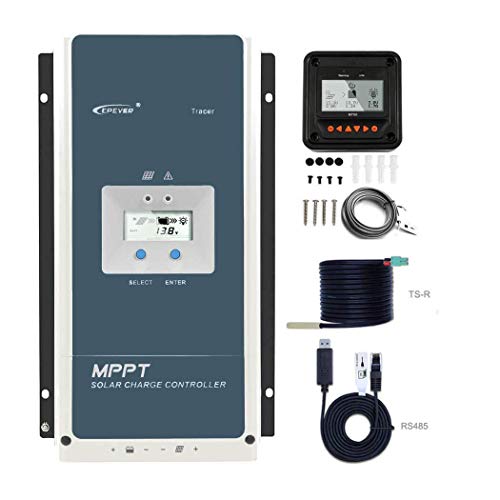
*Tech Tip: - We reference the “10% Rule” for 12v systems regarding the size of the Charge Controller (Charge Controller amps should be 10% of total solar panel wattage). Please note that this isn’t actually how you do the math, it just conveniently works out that way for 12v systems. - See the Solar 101 Tutorial for the actual equation or to calculate for 24v and 48v systems.
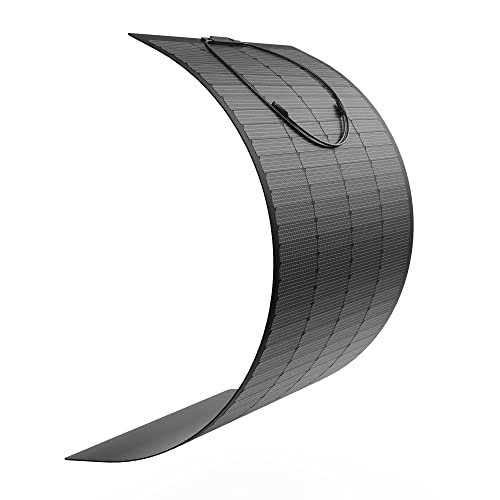
Solar Panels: - Ultimately, you have some flexibility here, but with current pricing you should go with Monochrysalline Panels. We currently use Alrska for their Price, Efficiency, and unique sizes. Use the Solar Cheat Sheet Tutorial to get an idea of what size (“How Much Solar”) you need and how to “Start Small and Scale Up”.

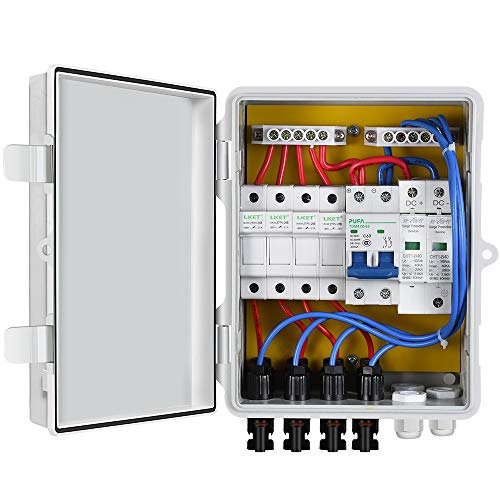
Please note: If you are connecting 4 or more Solar Panels in Parallel Configuration it is best to use a Combiner Box, both for safety and Simplicity. Click the image to compare. Again, more info in the Cheat Sheet.
At this point you have a Full Solar Setup that is scalable to your needs.
We hope that helps! - Please be sure you fully understand the info in the Solar 101 Tutorial and include the Breakers and Switches from the Solar Cheat Sheet before setting it up, but this should simplify the process
- Freedom is closer than you think!
Quick Links:
Start The Engine - Establishing a Budget - Making a Living on The Road - Choosing a Rig - Do I Need A CDL? - Designing a Skoolie Build - Step By Step Build Order - Skoolie Toolbox - Doing a Build On The Cheap - 10 Tips to Save Power and Money - Skoolie Build Ideas - Solar 101 - “Inverter/Charger/Switch” or 3 Separate Devices - Simple Solar - Solar Cheat Sheet - Step by Step Solar - Water Setup - Propane Setup - Skoolie, Van, & RV Air Conditioning DE_Mystified! - Skoolie Heating - Insulation - Digital Nomad Connectivity - Choosing a Domicile State - Converting a Commercial Title - Van, Skoolie, and RV Insurance - Camping Clubs, Subscriptions, and Passes - Road-Skool / Home-School - The Simple Skoolie Kitchen
Jump To Page:
Home - Tutorials - Solar - Cooking - Refrigeration - Water - HVAC - Tech - RV Accessories - Gear - Swag.