
Updated 1/24/2022
Solar Power is usually the least understood aspect of doing a Bus Build or Van Conversion, especially when you’re first starting your research. – Truth be told, a lot of people who have been on The Road for a while don’t even understand it all that well. – It’s typically out of the realm of your experience, and comes with a pile of new math and new terms that can be difficult to grasp. - There are tons of videos and blogs out there (full of unfamiliar ideas) and solar calculators that toss out confusing numbers with huge price tags. - Sometimes it seems like you need a degree in Electrical Engineering just to power your bus… The good news? - You really don’t.
What you need is a basic understanding of how Power works, what each component of the system is, what each one does, and how it relates to your specific application. - When you are ready to start putting it all together, you’ll dig a little deeper into the math and engineering, but let’s start with defining the components and giving you a visual representation of how it all connects.
Want to skip the math altogether?: - If you are just looking for quick and easy suggestions on sizes and components for your Build, have a look at our Solar Cheat Sheet, and visit our Step-By-Step Solar Tutorial when you are ready to start putting it all together.
Skoolie, Vanlife, or RV Solar Setup
Use the following chart as a guide. – Click the image to download a larger, printable copy. - It’s okay if you don’t know what everything means right now. We will be defining terms as we go, and there will be a more in-depth description of each item and some insights as to what you will actually need at the end of this Tutorial.

Output: You will have two possible “Outputs” for power: A 12 Volt Distribution Box, and a 120 Volt Breaker Box. – In short, 12 Volt power will be distributed to various appliances and outlets via a Fuse Block, just like the one you have in your car. - 120 Volt is power will use a Breaker Box similar to what you have in your house or apartment.
12 Volt System: - Abbreviations: “12v”, “12vdc” This is a Direct Current (“DC”) system. This term will commonly be used to refer to the 12 Volt DC electricity that you pull directly from the Battery Bank or “House Batteries” in your Rig. – It is a completely separate system from the 12 Volt Battery in your vehicle’s engine compartment.
120 Volt System: - Abbreviations: “120v”, “120vac”. You will also see this as “110”, “110v”, etc. The numbers “120” and “110” are both used to describe the Alternating Current (“AC”) electrical systems like the one in your house or apartment. (Technically speaking, your home/apartment system can run anywhere between 110vac and 125vac. The terms are used interchangeably.) - The phrase “120 Volt System” and / or “Household Power” will be commonly used to refer to the 120 Volt AC system in your Rig, drawing electricity from the Inverter or Shore Power.
Input: Your system will have four possible sources or “Inputs”: Solar Power, Engine Power, a Generator, and Shore Power. It is recommended (though not required) to have all four, but you will need at least one.
Solar Power Input: - The Solar Panels convert light into electricity. They are connected (through a Breaker or Combiner Box) to a Charge Controller that regulates / optimizes the power, and uses it to charge your Solar Battery Bank (also called “House Batteries”). From the Batteries, electricity is sent to the 12 Volt Distribution Box (or “Fuse Block”) which is the Output for your 12 Volt System (12 Volt lights, 12 Volt outlets, and 12 Volt appliances).
A second line runs from your Battery Bank to an Inverter. The Inverter transforms the 12 Volt electricity stored in your Batteries to 120 Volts and sends it, through a Transfer Switch*, to the Breaker Box, which controls your 120 Volt System (Outlets used for any 120 Volt appliances).
Engine Power Input: - You can use the Alternator in the Engine Compartment of your vehicle to charge your Solar Battery Bank as well. We’ll explain more later, but essentially you are using an Isolator Switch (as shown) or a “DC to DC Charger” to connect the vehicle’s Alternator directly to the Solar Battery Bank (House Batteries).
Generator / Shore Power Input: - This basically amounts to connecting your Electrical System to an outside power source with an extension cord. - RV Sites with “Full Hookups” provide Shore Power, but it could be as simple as a drop cord plugged into an outlet in someone’s house.
Your Generator will plug into your Shore Power Connection as well. (Think of it as another source of Shore Power.) There are several Generators on the market that can provide ample Power to run your entire System. – The electricity from your Shore Power Connection runs through a Transfer Switch* to your Breaker Box (120 Volt System).
Note: Your Generator / Shore Power Connection only runs your 120 Volt System. Your 12 Volt System will still draw its power directly from the House Batteries, but you can use Shore Power to recharge your Battery Bank whenever connected (see below).
*The Transfer Switch controls which Input is used to run your 120 Volt System. As the name implies, it switches between Shore Power the and the Inverter (power drawn from the Battery Bank). - When you are Not connected to Shore Power you draw 120 volts from the Inverter / Battery Bank. When you Are connected to Shore Power the Inverter is disconnected from the System since you are drawing 120 Volts from an outside source. – While it is possible to Manually switch between Shore Power and Inverter / Battery Power, it is highly recommended that you use an Automatic Transfer Switch as shown in the diagram.
Shore Power Charging: - With the addition of a Smart Battery Charger, you can use the electricity from Shore Power (or a Generator) to charge your Battery Bank (House Batteries) whenever connected to Shore.
Basic Electrical Theory and Common Terms
While the Engineering Degree isn’t required, there are a few technical concepts that you need to understand in regard to any Electrical Setup. It might seem complicated at first, but hopefully by the end of this article you will have a clear idea of how it all works. - A rudimentary grasp of these terms is essential, as they will come up constantly in your research, and will be absolutely necessary to correctly design and install the Power System for your Bus, Van, or RV.
First, let’s discuss the difference between “Direct Current” and “Alternating Current”, most importantly, the fact that the two do not go together. They are always separate systems. - In your Rig, the 12 Volt System is Direct Current (“DC”), and 120 Volt System is Alternating Current (“AC”).

Direct Current: - Abbreviation: “DC”, “dc” - This is the type of electricity that you get from a Battery (any Battery). The power flows in a “direct” line from Positive (+), through the device, light, or appliance and back to Negative (-) at the battery. The leads cannot be reversed. Positive is the Red wire. Negative is the Black wire.

Alternating Current: - Abbreviation: “AC”, “ac” – This is the power that you have in your house or apartment. The electricity actually “Alternates” back and forth between Negative and Positive, although “Negative” and “Positive” are technically the wrong terms to use when discussing Alternating Current. - It’s just easier to think of it that way. - With AC Power they are referred to as “Hot” (Black wire), “Neutral” (White wire), and “Ground” (Copper or Green wire). When discussing AC, you should get used to saying “Hot”, “Neutral”, and “Ground” (Electricity geeks will correct you on this.).
Connecting AC and DC Outlets: - For DC power you will Always Connect the Red wire to Positive (+) and the Black wire to Negative (-). With AC Power, you will always connect the Black wire to the Brass colored screws, the White wire to the Silver colored screws, and the Copper (or Green) wire to the Green screw (or the metal body of the switch, outlet, or box).
You will also be seeing many references to Voltage, Amperage, and Wattage (volts, amps, watts). Here is a basic explanation of what each term means, what it does, and how they relate to each other.
Wattage: - “Power” – Abbreviations: “watts”, “w”. Think of this as what (“watt”) a device needs to function, or how much Power it uses or creates.
Amperage: - “Intensity”, “Current” – Abbreviations: “amps”, “a”. As you might guess, this is basically how Intense the electricity needs to be for a device to run.
Voltage: - “Electromotive” – Abbreviations: “volts”, “v”. You can think of Voltage as what “pushes” the electricity through the wires.
Note: Almost no one uses the terms “Intensity” or “Electromotive” anymore. We only make mention of them to help you understand that P = watts, I = amps, and E = volts. You will need that for the following:
Let’s have some “PIE”: - We’re going to give you a little bit of math here, but trust us, it’s important. Remembering this equation, P = I x E, will help you calculate just about everything you will need to get your system up and running. “PIE” means that Watts = Amps x Volts (or Volts x Amps = Watts). So, something running on 12 volts at 10 amps is using 120 watts of Power (12v x 10a = 120w). – This also means that something using 120 watts on 12 volts, will draw 10 amps of Current (120w / 12v = 10a). The math works both ways.
This simple equation is vital when you are trying to size the Charge Controller, wires, breakers, fuses, etc. for your system. It will also be needed when you start to figure out your daily amperage use (or power consumption), which is directly tied to how much Battery storage you need.
The important part to remember here is that Amps, Watts, and Volts are always relative to each other. If one changes, another must change as well. - A higher Voltage means it takes less Amps to create the same amount of Watts. - A higher Wattage appliance takes more Amps (or more Volts) to operate.
The Bucket Analogy: It may be easier to understand all of this if you think about filling a bucket with water. Wattage would be how much water it takes to fill the bucket. Amperage would be the size of the hose you’re using to fill the bucket. Voltage would be the amount of water pressure pushing it through the hose. - The more water pressure you have (more volts) the smaller hose you need (fewer amps) to fill the bucket (watts). - If you use a larger hose (more amps) you need less water pressure (fewer volts) to get the same amount of water to flow (watts).
With “PIE”, as long as you know any two of them (amps, volts, or watts) you can calculate the third. – You will need all three to appropriately Size anything going into your system. - This is why, when someone asks, “How many Solar Panels do I need…?” or “How much Solar does it take to run a…?” the answer always starts with, “That depends on...” or “It varies because of...” – You need to know how many Amps and Volts to calculate how many Watts, and vice versa.
Amp Hours: – Abbreviation: “ah”. You will notice that Batteries are rated in “Amp Hours” (typically 100ah, 125ah, 200ah, etc.). This refers to the amount of charge a Battery can hold, or the capacity of the Battery when fully charged. - You can think of Amp Hours as the number of amps a Battery can supply for one hour, - Our 12 volt, 10 amp appliance from the example above can run for one hour on 10ah, or could run for 10 hours on 100 amp hours of Battery (assuming no resistance and nothing else is running).
Two more terms that you will be seeing a lot of are Parallel and Series, referring to the configuration or “how the system is connected”.

Parallel Configuration: - Connecting 12 volt Batteries (or Solar Panels) “in Parallel” will always give you 12 volts. Each of the Positive (+) terminals are connected to another Positive, and each of the Negative (-) terminals are connected to another Negative.
Series Configuration: - If you connect the Positive terminal of one Battery (or Panel) to the Negative terminal of another, “in Series”, you are effectively making a single 24 volt Battery out of two 12v Batteries. Do this with 4 Batteries and you have 48 volts.
The math gets a little more complicated when you start discussing 24v and 48v Systems, but as you may have guessed, “PIE” still applies. Look for an upcoming Tutorial dedicated to this topic.
Components of a Solar Power System
Now that we have a basic grasp on electrical terms and systems specific to Nomadic Applications, we are ready to get into the “nuts & bolts” of how to setup Power for your Bus or Van. - In the following section we will describe the items needed to make Nomad Solar Power a reality. More information on each of these components is available on the Solar Page or in the Solar Cheat Sheet Tutorial. - Click the images to get an idea of options and pricing.
Solar Input Components

Solar Panels: - Light is captured by a Photovoltaic (“PV”) cell and converted to electricity. The amount of electricity a Solar Panel can create is based on the number of PV Cells it contains. - Rated in watts, they come in 3 main types; Monocrystalline, Polycrystalline, and Thin-Film. Monocrystalline Panels put out the most Power and are only a little more expensive than Polycrystalline Panels, which are about 5% less efficient. Thin-Film Panels cost the least, but are a distant third for efficiency. - The best bet is to go with Monocrystalline, though if you’re on an extremely tight budget, or have very minimal Power needs, “Poly” panels will do.
Thin Film were the first widely produced “Flexible” Solar Panels (will fit the curvature of a Skoolie, or Airstream roof), and reputed to be more durable and easier to mount. However, since using direct mounted Flexible Panels doesn't allow for air-flow under the panels, they are more susceptible to heat, reducing efficiency even further. - You can now also find “Mono” or “Poly” Flexible Panels, but will still see a drop off in overall efficiency for the same reasons. More heat = less efficient, and the curve of a Flexible Panel means less of it directly faces The Sun.
Solar Panels are rated for the maximum Power output they can produce, but what you get from them will vary greatly. - You'll probably never actually get 100 watts out of a 100 watt Solar Panel unless you happen to be parked on the Tropic of Cancer, at noon, on the Summer Solstice. – This why people commonly “tilt” their panels toward the sun. It is an easy way to increase overall efficiency. - More direct sunlight = more electrical production.

Combiner Box: - Despite the paragraph above, you should always be prepared for an Electrical Surge. - Just like the surge protector on a power strip, you’ll want a Breaker or Fuse in the line between your Panels and your Charge Controller. If you are using 4 or more Solar Panels, this is best accomplished by connecting them to a Combiner Box (which contains a built in Breaker) and then connecting the output of the Combiner Box to your Charge Controller.

If you only have 1 or 2 Solar Panels, A Breaker will do the job, and also serve as a “shut off switch” for your Solar Array. - See the Solar Cheat Sheet Tutorial for more info.
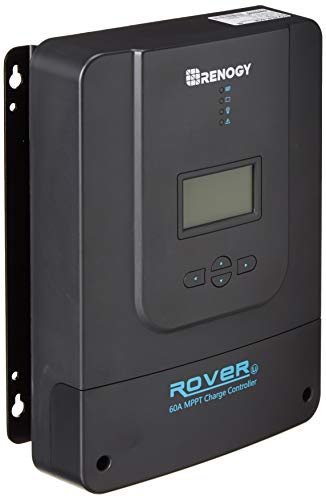
Charge Controller: - As noted, the output of your Solar Panels will vary greatly depending on cloud cover, the angle of the sun, and several other factors. - The Charge Controller optimizes the (variable) Power you are getting from the Panels and uses it to charge your Battery Bank.
There are 2 main types of Charge Controller: “PWM” and “MPPT”. A PWM will be less expensive, but uses older technology and is far less efficient. Unless you have a very small Solar Setup or are on an extremely tight budget, MPPT will be the better choice.
Rated in amps, you will use “PIE” to figure out what size you need. – Example: If you have 200 watts of Solar Panels on a 12 volt System you get 16.67 amps (200w / 12v = 16.67a). For safety reasons (and in case of a Surge) it is commonplace to multiply this by a factor of 1.2, meaning that you’d be shopping for a 20 amp Charge Controller (16.67a x 1.2 = 20a). 400w of Solar Panels = 33.3 at 12v. Multiply by 1.2 and you get 40 amps, 600w is 60amps, etc.
House Batteries: - The Batteries that store the Power for your Bus or Van are different than the Battery that starts your car. In your personal vehicle you have a “Shallow Cycle” Battery, that is designed to blast out a large amount of Current for a brief moment, and then recharge quickly to a state where it can do it again the next time you turn the key. – What you need for your House Batteries (Battery Bank) is a “Deep Cycle” Battery, designed to hold substantial current that is slowly discharged (used) and relatively slowly recharged by your Solar Panels, Isolator, or Shore Power.

There are three types of Deep Cycle Batteries readily available: Lead-Acid, Sealed Acid, and Lithium Ion. - Lithium is far and away the best, effectively giving more use of the amp hours stored as well as providing several more “cycles” (number of times it can be charged and discharged over the life of the battery). Also called “LiFePo”, Lithium is far more expensive, although the prices have been steadily coming down over the last year or so. * Visit our Solar Page for current lower cost Lithium Battery options.
If your budget is tight, Sealed Acid AGM Batteries are the clear second choice, and will typically last for 3-5 years, however, keep in mind (and plan for) the fact that you will most likely want to upgrade to Lithium at some point.
Lead Acid Batteries used to be the standard in the industry, and some people still swear by 6 volt golf Cart Batteries (click for example). While Lead Acid can be slightly cheaper than AGM, they require venting and maintenance. In our opinion, not worth the moderate savings.
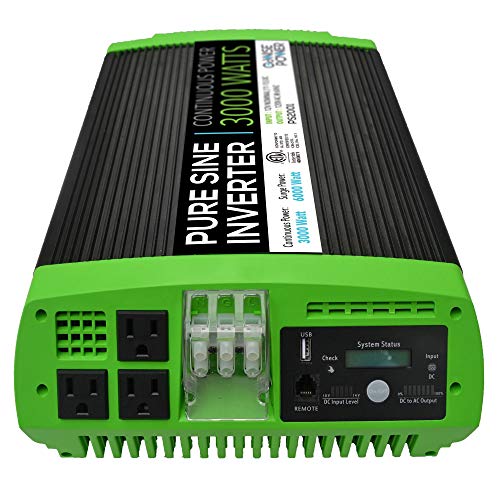
Inverter: -Rated in watts, this is how you convert the 12v DC from your Battery Bank to 120v AC to run the household appliances that you use in your Rig.
The most commonly used Skoolie, Vanlife, or RV Inverter sizes are between 1500w and 3000w (though, much larger is available). This will run just about any 120v appliance you are likely to use, though you should start paying attention to the amp and wattage rating of the things that you currently have, and consider going with a smaller appliance, if at all possible. - e.g., a 700w microwave vs. a 1200w microwave.
Inverters come in two varieties; “Pure Sine Wave”, and “Modified Sine Wave”. Without digging into the engineering on the matter, Pure Sine Wave is the way to go. Think of it as “cleaner” Power. Anything that uses a chip, such as electronic devices or Energy Star Appliances, can potentially be damaged by a Modified Sine Wave.
Bear in mind that it is rated in watts at 120 volts, so your “PIE” equation changes. An appliance drawing 10amps at 120volts is using 1200 watts (10a x 120v = 1200w). Sadly, you are still drawing this power from your 12vdc Battery Bank, so to figure out your Amp Hour Consumption you have to “PIE” that as well. - 1200 watts at 12 volts is 100 amps (1200w / 12v = 100a). Running this appliance for one hour will still use 100ah of Battery storage (actually a little more due to loss in the conversion process). - This is why we repeatedly say, “Keep appliances under 1500 watts.”, “Run as much as you can on the 12 volt System.”, and “Turn the Inverter Off when you’re not using 120v.”
Engine Charging Components

To use your Engine Alternator to charge your House Batteries, you’ll choose between an Isolator Switch and a DC to DC Charger.
For most of Nomad History the Isolator Switch has been the preferred method of charging House Batteries via the engine alternator. It works by mechanically switching the charging current from the engine battery to the House Batteries once the engine battery reaches a full charge.
It is a simple device that is either “on” or “off”, directing 100% of the available electricity to the battery currently being charged. An Isolator Switch will work well with older vehicles and Lead Acid or AGM Batteries, however, it is not recommended for use with Lithium, or any vehicle with a “Smart Alternator” (typically 2015 or newer). In fact, the demands of Lithium Batteries on an Isolator Switch may overload and damage your Alternator.
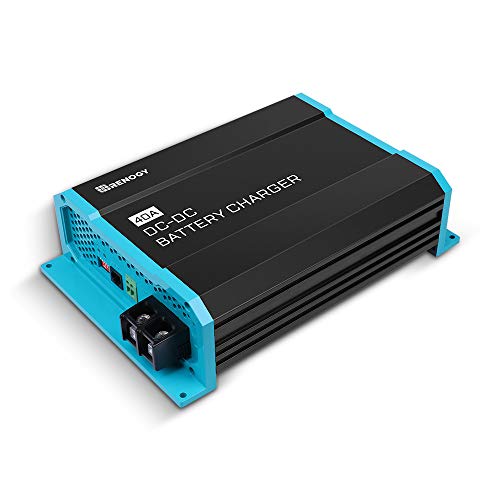
The more technologically advanced DC to DC Charger pulls electricity from one source (either the Alternator or Engine Battery), and releases it in multiple stages based on the type, condition, and charge level of the House Batteries, as well as the condition and status of the source (Alternator or Engine Battery).
DC to DC Chargers are slightly more expensive and complicated to install, but optimize House Battery charging while protecting the vehicle’s electrical system. In short, if you are using Lithium Batteries, in a newer vehicle, or recently upgraded your Alternator, a DC to DC Charger is your best bet.
Shore Power Components

Shore Power Connection: - This is literally the male end of a plug that you use to connect your Power System to an outside source. They come in 15 amp, 30 amp, and 50 amp varieties, with 30a being the most commonly used and most widely available at RV Parks. Sometimes there will be a 50a or 15a as well, but the majority of parks will only offer a 30a Connection (Adapters are available to connect this to 50a or 15a on the Solar Page).
In most cases a 30 amp Shore Connection is more than enough. The main argument for getting a 50 amp Connection would be if you want to connect to a 50 amp Generator or 50 amp Shore Power, when available. - Unless you are running more than 3600 watts at once, or want faster charging for a large Battery Bank, you shouldn't need a 50 amp service (“PIE” – 120v x 30a = 3600w).
Automatic Transfer Switch: - We do know people that have a Manual Switch that says “Shore” in one position and “House” in the other. That essentially accomplishes the same thing, as long as you know where it is and where it should be at all times. (Also, if you’re willing to take the risk that you may have to go out in the rain or cold to manually switch it.)

At a price point of around $80, however, an Automatic Transfer Switch may be the best money you ever spend. Not only does it avoid the above, provide peace of mind and simplicity, but will also stabilize the input power from whatever source is being used.
As with Shore Power, 30 amps is probably enough, but if you do go with a 50amp Shore Power Connection, you’ll want a 50amp Transfer Switch as well.
Smart Battery Charger: - Many people make the mistake of thinking that a “Trickle Charger” (like you would get at a hardware store) can be used to charge your House Batteries. - Simply put, this isn’t what it’s designed to do. It is set up to recharge a Shallow Cycle Battery (like in your car) and doesn’t put out enough current to effectively charge multiple Deep Cycle Lithium or AGM Batteries like you will have in your Rig.

A “Smart” Battery Charger will use a much higher amperage to charge your Battery Bank while connected to Shore Power, and adapts the inbound current to optimize for the size of the bank, charge level, and type of Batteries you have. You’ll typically see Smart Battery Chargers rated at 45-100 amps at 12vdc (compared to 5amps or less on a Trickle Charger).

*Combination Unit, Inverter, Charger and Transfer Switch in One: - It is possible to combine the Inverter, Charger and Automatic Transfer Switch into one unit. – It will have a Shore Power Input, a 120v Output, and a Battery Connection, both for Charging and Inverting Power. – The biggest advantage of going this route is that it simplifies your setup (one piece of equipment instead of three). It’s also a great idea if you have limited space for your Build.
There are a few points to consider before deciding on a Combination Unit, but with current technology an “All-In-One” is often the way to go. Click here to read our Tutorial on the subject for a more in-depth comparison.
Generator: - Carrying a Generator on The Road is like Taking Shore Power with you! - There will absolutely be times that you simply don’t get enough sun to charge your House Batteries, and running the vehicle engine for hours to get it done with the Isolator isn’t practical or efficient.
Additionally, if you want to use an air conditioner or other high wattage appliances, there’s a good chance that your House Power Systems simply won’t keep up. Even a modest air conditioner can drain 100ah of battery in about an hour. For the cost of a gallon or two of gasoline you can use the Generator to run those high watt appliances for 8 hours and still have a full Battery Bank when done.
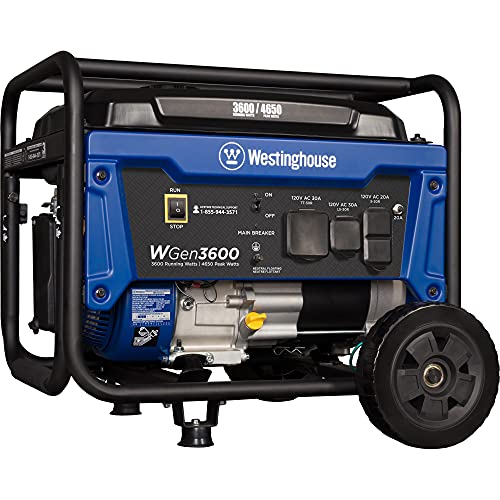
Most people think “bigger is better” when choosing a generator, and this is true. However, remember that running it through a 30 amp Shore Connection means you won’t actually be able to use more than 3600 watts anyway (“PIE”) - It would be a max of 6000w if you have a 50 amp Shore Connection. – Be sure that you get a Generator with the appropriate output connection (plug) for your Shore Power Input. Most come with 15a and 30a. Some also have 50a.
House Power Systems

12 Volt Fuse Block: - You can buy an aftermarket fuse box, just like the one in your car, with the “blade” type fuses. Take a look at the chart for an idea of how many spaces you need (6-10 is usually more than enough). Using “PIE” you can calculate what fuse sizes you will need based on the voltage (12) and the wattage ratings on the actual lights and devices you will be using. -Watts / Volts (12) = Amps (Fuse Size needed).
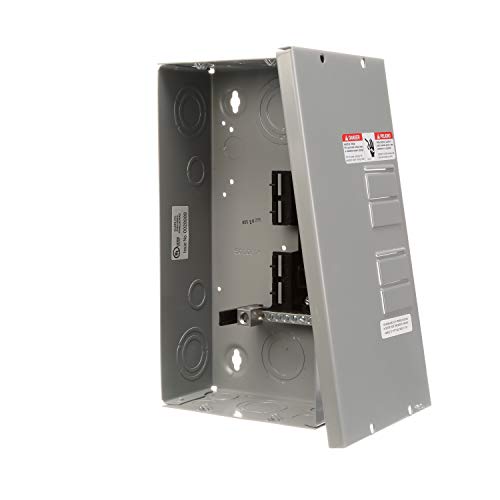
120 Volt Breaker Box: - It will be smaller than the one in your current house or apartment (4-6 Breakers is probably plenty), but it’s essentially the same thing. Again, use “PIE” at 120 volts with the wattage ratings of the appliances to calculate the Amperage. Size the Breakers accordingly.
Wiring: - You can use standard household 12/3 wire for your 120v outlets (black, white, copper). - In most cases 18 or 16 gauge automotive wire will work for the lighting and outlets of your 12 Volt System, although, high amperage appliances (“PIE”) or really long runs of wire, may require a heavier gauge. – Click here for a chart.
*See the bottom of the Solar Page for Wire, Switches, and additional Accessories.
As for the wires to hook up your Solar Components, this topic will be covered in a future Tutorial, but again, you’ll use “PIE” to figure out what size (gauge) you need.
Outlets and Switches: - Standard Household Outlets will work for your 120 Volt System. - It’s still a good idea to use a GFI outlets for any that are close to water. – Cigarette Lighter style outlets are best for your 12 volt wiring, though many options exist with USB ports standard. 12v automotive switches will work, as well as 12v dimmers.
Hopefully this has given you a basic understanding of what is needed and how it all works. More information is available on the Solar Page or Solar Cheat Sheet Tutorial. - While Solar may be the least familiar aspect of designing and Building a Skoolie, Shuttle, or Van, it is within your reach.
-Freedom is closer than you think.
Quick Links:
Start The Engine - Establishing a Budget - Making a Living on The Road - Choosing a Rig - Do I Need A CDL? - Designing a Skoolie Build - Step By Step Build Order - Skoolie Toolbox - Doing a Build On The Cheap - 10 Tips to Save Power and Money - Skoolie Build Ideas - Solar 101 - “Inverter/Charger/Switch” or 3 Separate Devices - Simple Solar - Solar Cheat Sheet - Step by Step Solar - Water Setup - Propane Setup - Skoolie, Van, & RV Air Conditioning DE_Mystified! - Skoolie Heating - Insulation - Digital Nomad Connectivity - Choosing a Domicile State - Converting a Commercial Title - Van, Skoolie, and RV Insurance - Camping Clubs, Subscriptions, and Passes - Road-Skool / Home-School - The Simple Skoolie Kitchen
Jump To Page:
Home - Tutorials - Solar - Cooking - Refrigeration - Water - HVAC - Tech - RV Accessories - Gear - Swag.