

It can sometimes be disheartening watching Van and Bus Tour Videos, especially if you're on a budget. The high-end materials, top of the line appliances, and massive Solar Setups, can quickly make you start question if Skoolie or Van Life is even within your reach. Those videos often seem more like an episode of “MTV Cribs” or “Lifestyles of the Rich and Famous”, than a realistic way to travel and escape the daily 9-5 and suburban rat-race.
For many of us, one of the biggest reasons to become a Nomad to begin with is the idea of getting by with less; less money, less work, less stress, less... crap. It seems ironic that the very first part of this journey is met with a seemingly unrealistic financial commitment to a project (Your Build) containing several smaller projects (Power, Water, Construction, etc.) with which we may have little or no experience, and that each seem to come with an inordinately large price tag.
Take heart, however! Before you crumple up that preliminary $50,000 Build Budget, and shake your head in disbelief as you give up on the dream, understand that it doesn't have to be like that. - It doesn't have to be like that, At All!
Doing a Build On The Cheap is well within your reach, even if your budget is literally no more than you can spare out of your paycheck, or the money you make as you start to sell off things that you won't need on The Road. - Sure, you'll still need to buy a vehicle, but that can literally be the most expensive part of the project. In fact, if you like, you can set yourself a goal that your initial Build will cost less than your Bus, and that is a goal you can achieve!

The first step is to Change Your Mindset: Despite what you've seen on YouTube, you are not building a 5-star hotel. It doesn't have to be perfect, and you don't have to impress anyone. It doesn’t even have to be “complete” when you hit The Road! - What you need, is something that is functional. You need a place to sleep. You need a way to store and prepare food. You need water to drink and bathe, and preferably a place to go to the bathroom. Beyond that, you might need a place work, amenities for pets, Power, and potentially Heat (though you can actually add that later). Your individual situation might dictate a few other items, but when you really break it down, the above list are the necessities. Figure out what else you absolutely can't live without, and consider the least expensive way to accomplish those things.
It is actually much smarter to build inexpensive “mock up” versions of what you envision for each item, and hit The Road with those in place. - You will, without question, be making adjustments, upgrading, and changing things later. - Ask anyone who has been out here for a while and they will say, “I wish we hadn't done this... I wish we hadn't spent so much on that... I wish we had done this differently...” What you think you need now and what will actually work for you on The Road is almost certainly going to change, and (if you Establish a Living Budget, and stick to it) you will have more time and money, and much better idea of how to do things “right” after you have been on The Road for a while. - Trying to do the Perfect Bus or Van Build before you ever leave your Driveway is actually a big mistake.
We're going to go through each of the Build Necessities listed above, as well as a few other common areas, and give you some thoughts ranging from the “Ultra-Cheap” to “Realistically Inexpensive”, and some ideas on how to “Start Small and Scale Up” with each system. There are, of course, several other things you can do to keep the costs down. - Get Creative, and don’t be afraid to Think Outside The Bus.
What about the Vehicle itself?: If you've read our Choosing a Rig and Designing a Build Tutorials, you know that we often say “less is more”. Smaller is better. There are many advantages to a smaller Rig, both with the cost of the initial Build as well as living expenses once you're mobile: less material, less square footage to Heat and Cool, better fuel economy, more Stealth Camping Options, less stress, easier to drive and access certain areas, and (very likely) cheaper Insurance and maintenance costs, the list goes on and on... I realize that right now you're probably already stressing on how to cram your whole life into an 8' by 32' space, but in reality, that is probably much more than you need. Unless you're a family of 6, “less is more”. - Once you’re on the Road, you'll probably find that you spend a lot of time outside the Rig, and if you need more room to live, a decent sized tent or quick-shade will cover a surprising amount of your activities. (You don’t need all that space when you’re driving.)
Ultra Cheap: If you are on a very tight budget, consider buying a well-used RV, Camp Trailer, or doing a minimal Build on a Truck Bed Camper or Cargo Van. - You'll avoid the hassle and expense of Converting the Title, and finding Insurance will be much easier. Additionally, you'll have less to lose if, for whatever reason, you find that the lifestyle just doesn't work for you (it does happen).
Realistically Inexpensive: In this case the best advice is to Be Picky and Be Patient when selecting a Rig. The process can be long and arduous. You will probably fall in love with several vehicles along the way, only to find out that they have “deal breaker” issues. Hold out for a Bus or Van without mold or major mechanical problems, and preferably one you don't have to repaint. It's actually better to spend a little extra time and money up front than it is to risk spending thousands on major repairs.
Start Small and Scale Up: Consider the option of upgrading later. You don't have to Build your “Dream-Bus” right now. A first-Time Home-Buyer typically doesn't plan on living in that house forever, and the same can apply to a Skoolie or Van. - Find a Rig, and Design a Build that will work for you, with 3-5 years in mind. - By then you'll have a better idea of what you want and need, you'll acquire or upgrade most of the Build Items along the way (most of which you can use on the next one), and you should be able to save up enough money (and experience) to do your second Build exactly the way you want it.
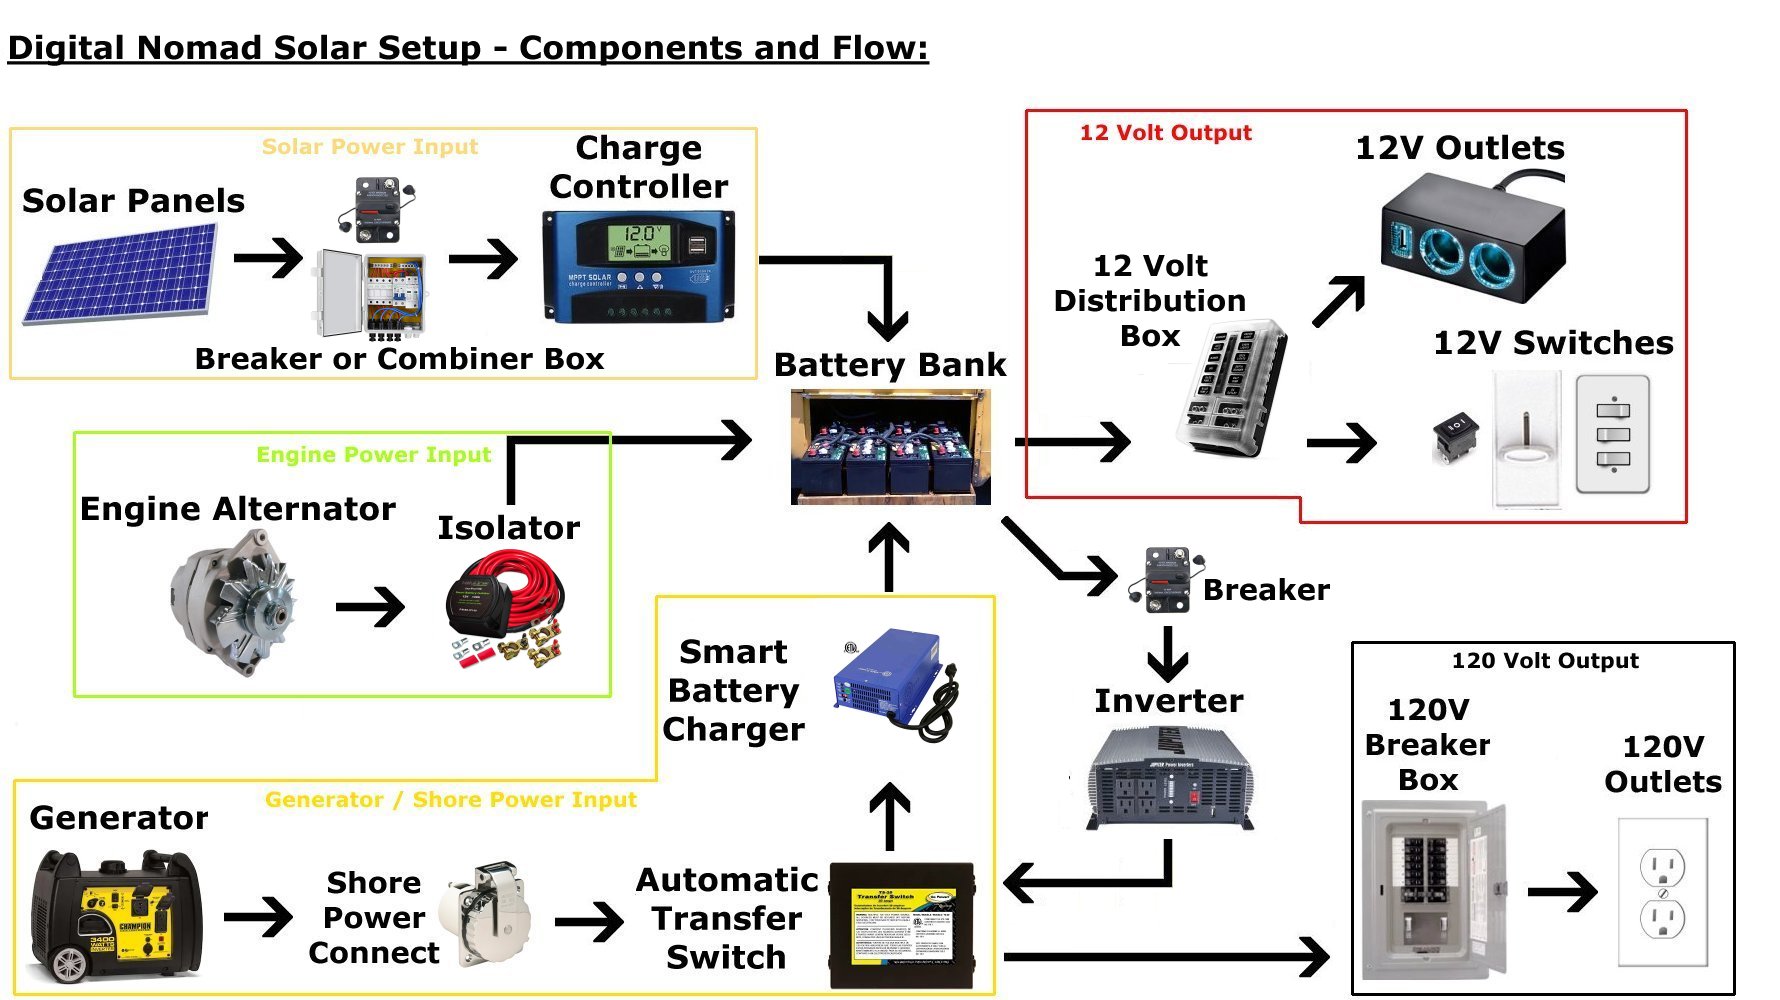
Cheap Solar (and Shore) Power: Since this can easily be the most expensive part of your Build and tends to be the area with the highest learning curve, we'll cover it first. The truth is, most people actually over-shop and over-build in this area. - Have a look at our Solar Cheat Sheet and 10 Tips to Save Power Tutorials for more info (or if you're new to Solar), but here are some budget friendly ideas to get you going. (Click the chart to enlarge for reference.)
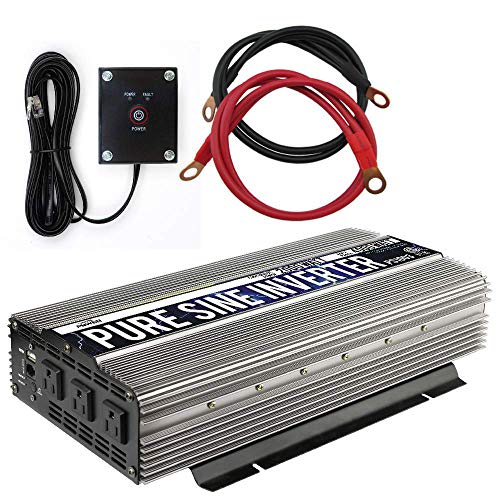
Ultra Cheap: You can start with no Solar at all, and an extension cord for Shore Power. - Keep the existing 12 Volt lighting and run a few extension cigarette lighter outlets to charge phones, run laptops, 12v appliances, etc. You'll need to keep your 120v appliances to a minimum, but you can actually hook up an Inverter directly to the “car battery” to accomplish 120 volts (Click the image). Bear in mind that the engine will have to be running when you use them (otherwise the Inverter will quickly drain and eventually destroy your Rig's battery), but this option can get you by for a while.
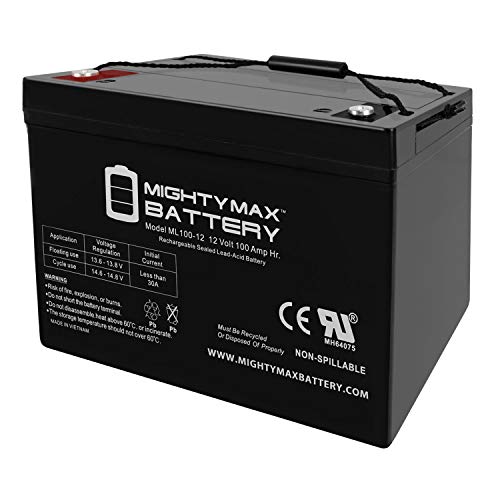
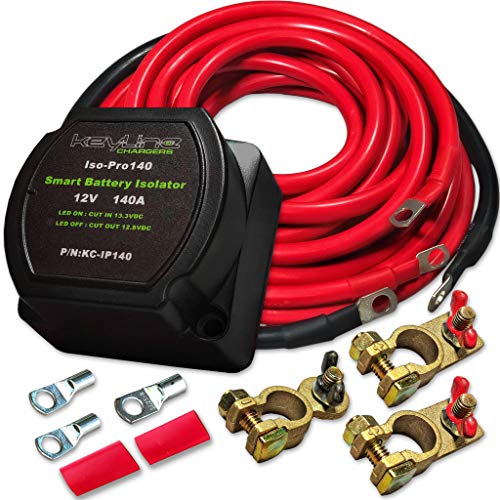
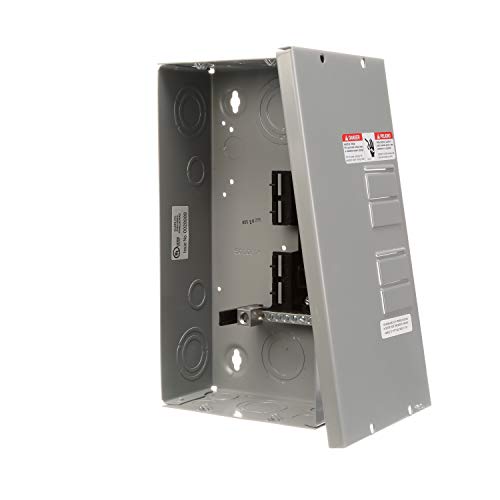
Realistically Inexpensive: Again, you'll want to stick with 12 volt appliances wherever you can. Invest in a couple of AGM House Batteries to start. Wire them in parallel and connect them to an Inverter for your 120v needs. You can charge the House Batteries with a Key Line Isolator connected to the engine alternator (click the images for suggestions). - Take it step further by connecting the Inverter to a small Breaker Box (run your House120v off of that) and you can add a Shore Power Connection that you can also use to connect a generator to your House Electrical. - The addition of a Smart Charger will allow you to charge your House Batteries from Shore or with the Generator. (Click the above chart and see our Solar Cheat Sheet and Solar Page for suggestions.) - You can switch between the Inverter and Shore Power manually, but the TS 30/30 Automatic Transfer Switch is so inexpensive (and useful) that it's almost silly not to get one.

Start Small and Scale Up: The above setup can easily be done for under $1000, and all you’re really lacking is Solar Panels and a Charge Controller. - Start with the above and add the remaining elements, as you can. - Check our our Solar Cheat Sheet to figure out how much you actually need.
Check out Step by Step Solar Install for specific instructions on Scaling up your System.
Food Storage, Cooking, and Propane Setup: We Can't say enough good things about the 12 volt “Cooler Style” Fridges (See Refrigeration Page). There's nothing at all wrong with using a household 120v refrigerator, (even the one you already have) but it will take a little more power.
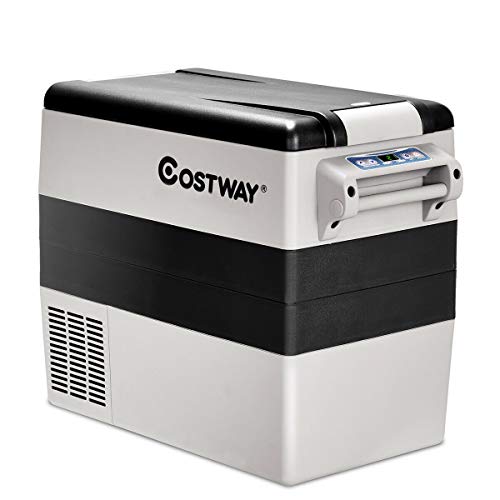
Ultra Cheap: Honestly, the cheapest thing you can do is stick with canned foods and pre-packaged snacks as much as possible. - A good cooler is a “must have”, but for under $350 (US) the Costway 12v fridge is money well spent! You can accomplish most of your cooking with a Camp Stove run on 1-pound bottles. (The cost of the bottles will add up, but there are ways to minimize this.) Doing so will allow you to get on The Road without doing a full Propane Setup (saving a few hundred dollars).
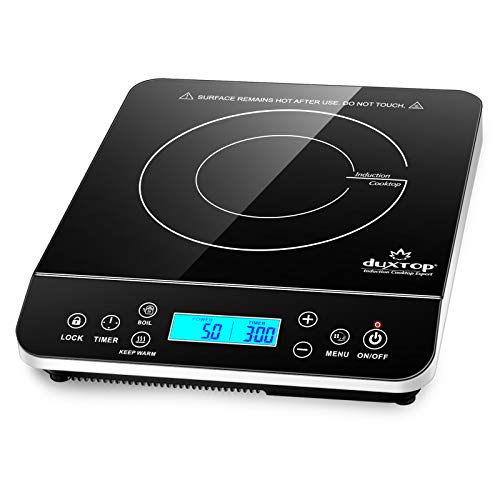
Realistically Inexpensive: Full disclosure: Our current Kitchen Setup is just a step beyond the “Ultra-Cheap” version described. We are “Propane Free”, but have a camp stove run on bottles. We do most of our cooking on an Induction cooktop (image), have a 700w microwave, and use an air fryer and an electric griddle from time to time. We actually have two 12v cooler fridges (one of which we use as a freezer), and we run it all on 400 watts of panels, 400 amp hours of Batteries, and a 3000 watt Inverter (that's “Group B” in our Solar Cheat Sheet). We don't have a full oven but we don't really miss it. If you absolutely need one you'll be committing to some sort of Propane Setup, but again, it can be a single line run to a larger Propane bottle.
Start Small and Scale Up: In all honesty our Kitchen setup is small. Start with the Ultra-Cheap”, and add the other items as needed in concert with your Propane Setup as you go. This can range from portable bottles all the way up to a Full Propane System as shown in our Tutorial.
Saving Money on Water and Bath: See our Water Setup Tutorial and our 10 Tips To Save Water, Power, & Money Article for more info.

Ultra Cheap: It will cost more in the long run, but your initial Build can consist of water jugs that you refill, a cheap sink (or even a large bowl that you dump), and 5 gallon bucket for Grey Water. - You can heat water on a camp stove and take “Navy Showers” (sponge bath) or couple it with a Gym Membership and use theirs. - We'd be lying if we said that we’d never used a 5 gallon bucket for a toilet, but there are several options (Water Page) that are relatively inexpensive, and building a DIY Composting Toilet is quite doable. Do a YouTube search or check out this book.
Realistically Inexpensive: In addition to the Tutorial, have a look at our Water Page for some great options and ideas for Outdoor and Convertible Showers. - Recirculating Showers are an idea that is gaining a lot of traction. See our Unique Build Ideas Blog (also several videos on the topic).
Start Small and Scale Up: In truth, a Full Water Setup isn't all that expensive. You could start with Bottles and perhaps a City Water Connection, but this might be an area where you want to just get it done from the start.
Heating and Cooling: Once again, this is a topic we've covered in earlier Tutorials (Air Conditioning DE-Mystified, Skoolie Heating, 10 Tips to Save...) and a lot of info can be found on our HVAC Page. - From the standpoint of keeping your Build expenses low, you'll find that the actual Heating and Cooling Units don't have to be all that expensive, so it really comes down to operating costs, which is directly tied to how well you insulate your Rig. - The answer is, that you really, really Should add insulation if/where you can.
Ultra Cheap: - If you absolutely can not afford to do insulation from the start, then Leave your walls accessible so that you can later. - Do it before you splurge on anything else. For now you can hang moving blankets over the windows and follow the weather, but add Insulation as soon as you can.
The Realistically Inexpensive: and Start Small and Scale Up: are pretty much the same here. Have a look at out Insulation Tutorial for price comparisons and just do it!
Flooring, Walls, Furniture, and Cabinetry on The Cheap: There is a lot to be said for the phrase “Open Floor Plan”, especially when money is a consideration.
Ultra Cheap: Leave it all as it is. Use the original walls, and floors (seal and repaint as needed). Rather than building any interior walls, you can hang curtains for privacy in the sleeping and bathroom areas. Re-purpose or adapt whatever items you already own. Your bed (or an air-mattress), furniture, totes, crates. Use a dresser or a desk for kitchen cabinets. Offer to clean out someone's garage in exchange for items they no longer want. You'll be surprised what you might find.

Realistically Inexpensive: Think Thrift Stores and Habitat for Humanity. - Always shop there first. - Call your local flooring and cabinet shops and ask for “remnants”. Most of these places have items in the warehouse that they will sell for pennies on the dollar. - For things you must build, think plywood and paint. (It doesn't have to be stained cedar to look good!) A cruise through the local Industrial area for pallets and “Free Wood” won't hurt either.
Start Small and Scale Up: Find a happy medium with the two paragraphs above. Rough in what you have to build and keep an eye on the internet for deals on upgrades.
Ultimately, Your Build is Your Business. There is a lot to be said for having a nice place to come home to, but don't let the fear of a price tag prevent you from chasing this dream and joining us on The Road. - It's worth every dime!
Quick Links:
Start The Engine - Establishing a Budget - Making a Living on The Road - Choosing a Rig - Do I Need A CDL? - Designing a Skoolie Build - Step By Step Build Order - Skoolie Toolbox - Doing a Build On The Cheap - 10 Tips to Save Power and Money - Skoolie Build Ideas - Solar 101 - “Inverter/Charger/Switch” or 3 Separate Devices - Simple Solar - Solar Cheat Sheet - Step by Step Solar - Water Setup - Propane Setup - Skoolie, Van, & RV Air Conditioning DE_Mystified! - Skoolie Heating - Insulation - Digital Nomad Connectivity - Choosing a Domicile State - Converting a Commercial Title - Van, Skoolie, and RV Insurance - Camping Clubs, Subscriptions, and Passes - Road-Skool / Home-School - The Simple Skoolie Kitchen
Jump To Page:
Home - Tutorials - Solar - Cooking - Refrigeration - Water - HVAC - Tech - RV Accessories - Gear - Swag.