
**Please Note: This Blog Post has been archived and may no longer be current. - Please view the newest version of this Tutorial by clicking Here.
How Much Solar Do I Need For my Rig?: -That's often one of the first questions aspiring Digital Nomads ask.
What's the answer?
There isn't one. - Just kidding. The truth is that there are several answers, and it comes down to your specific situation. How much Solar you need is based on how much power you use. - This is the point at which most blogs or videos on this topic will start laying into you with far too much Math that is far too complicated for most of us to comprehend... Sadly, it's impossible to cover this subject without delving into that a little, but we will try to keep it to a minimum.
If you’ve started going through one of those online “wattage calculator” applications, adding up the power drain for every appliance you could possibly ever use, you can stop now (thankfully). They will likely tell you that you need 847 bajiggawatts of power… You don’t. Unless you actually plan on using your Skoolie for time-travel.

The reason the math matters is because there are a lot of variables. What appliances do you use?. How big is your Solar Array? Do you have the best RV Solar Battery? Etc… Unfortunately, you won't fully know the all of the answers to those questions until you've been on The Road for a while. Your personal usage will almost certainly change once you go Full Time, and in reality, 1500w appliance, doesn’t use the full 1500w every moment of every day, even when it’s running. That's why the math (even if you do understand it) is literally “academic” at this point.
*Please note: This blog is designed to be an entry-level tutorial on components and setup of a Skoolie, Van, or RV Solar System. It isn’t a 500-level engineering class. Our goal is provide simple “rule of thumb” solutions that will give you a basic understanding and get you on The Road.
Update (8/8/2020): If you’d like to skip the math altogether and see our suggestions for what components you need, and at what size, please have a look at our Solar Cheat Sheet.
In short, how much power you have depends on how much power you generate and how much power you store in your Solar Battery Bank. That, of course, depends on the total wattage of your Solar Panels, the number and quality of your Batteries and how efficiently you collect, charge, and store the energy from the sunlight you actually get.

The Simple Answer?: If money is no object, just go ahead and buy the biggest RV Solar Kit you can (and pleeeaassseee buy it through our affiliate links!) and pay an Electrician to hook it all up for you. Oddly, if you do your research, a medium to large Solar Kit doesn’t have to be all that more expensive than a Starter Kit.

The more Practical Answer?: Start small and scale up. You know that you're going to want to take your Rig out camping a few times while you're in various stages of your Build, so start with a singe Solar Panel, a Charge Controller, a decent Battery, and an Inverter (or a Small RV Solar Kit). Put it all together, following all manufacturer's guidelines and safety protocols (No… Really!) or go through our Solar Cheat Sheet to get a System sized to your projected usage.
Make sure you have the types of electrical appliances you'll likely be using every day. Take it out for a long weekend and use power as you would normally expect to on The Road. Bear in mind that results will vary, sunny vs. cloudy, etc., but this will give you an idea of how close you are to your final Skoolie Solar Setup.
Adjust your Solar Panels and Battery Bank as you go. *If your battery more or less stays between 75% and 100% charge, you’re probably good to go! *If you find that you're running out of juice or dropping below 40% or so you probably want to upgrade.
But Upgrade What?: - My friend Carl Thomas put it best: “If it dies during the day, add a Solar Panel to the roof. If you loose charge at night, add a Battery to the bank.” - In your journey to optimize your system, you might get into the math here, but you can upgrade or continue these adjustments indefinitely as you go. Your Off-Grid Solar Setup is completely scalable.
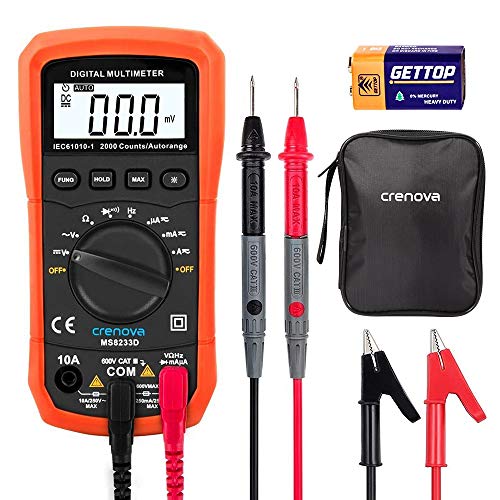
Measuring the Charge: If your Solar Kit doesn't come with a charge monitor of some sort, a simple Multi-Meter will do the trick. Either way, it is a Very wise investment to add one of these to your toolbox!
Okay, but how does it all go together? The first and best advice here is RTFM. The Dealer Manual will tell you a lot. Of course, watch as many videos on the topic as you can, and don't be afraid to ask a professional for help. For a simplified user-guide we've created this chart. (Click to enlarge.)

Essentially, the Solar Panels collect power from The Sun, which flows through the Charge Controller into the Batteries. - The amount of power being collected goes up and down, so you need a Charge Controller to regulate the flow into the Battery and prevent over-charging. - The 12 Volt System runs straight off the Solar Battery Bank. The Inverter converts your 12v (“DC”-Direct Current) Battery Power into 120v (“AC”-Alternating Current) Household Power , which is then connected to your 120v System.
For the Entry Level Folks: “120” and “110” are used interchangeably to mean “Household Power”, like the outlets in your house. - “220” & “240” would only come into play if you are trying to use a Household Dryer or Electric Oven. - Unless you’re planning on running a mobile welding service, there is really No Reason to run 220 in a Skoolie or Van. - Your Solar Setup will be far more complicated and expensive. - Hire a pro if you’re considering doing so. (If he or she doesn’t try to talk you out of it… Fire them and hire someone who does.)
Short Bus Tip: Running appliances on the Inverter uses more energy than running things on the 12 Volt System. Skipping the math on the matter, the fewer things you put in your Build that need 120v AC, the longer your Battery Charge will last. Additionally, the Inverter will continue to draw power even when not in use. This is why most people switch their Inverter “off” until they need to run 120v appliances. Of course, if you go with a 120v Fridge you'll have to leave the Inverter on all the time. - See our 10 Tips to Save Power Blog for more info, and check the Refrigeration Page for 12v options.
You're not completely dependent on The Sun for your power. You,re going to want a Shore Power Connection anyway (for full hookup RV Parks and when you “camp” in someone's driveway), so why not charge your RV Battery whenever you're connected? You'll need a Transfer Switch and a separate Smart Charger. (More on this later.) Additionally, your vehicle already has a system for charging the engine battery conveniently in place (the Alternator). It is relatively simple to connect this, through an Isolator Switch, to your Solar Battery Bank and charge your House Batteries whenever the engine is running. The Isolator Switch and Transfer Switch basically ensure that power is being drawn from a specific source and is flowing correctly trough the system.
-With all of that in mind, this chart shows a more advanced RV Solar Setup.
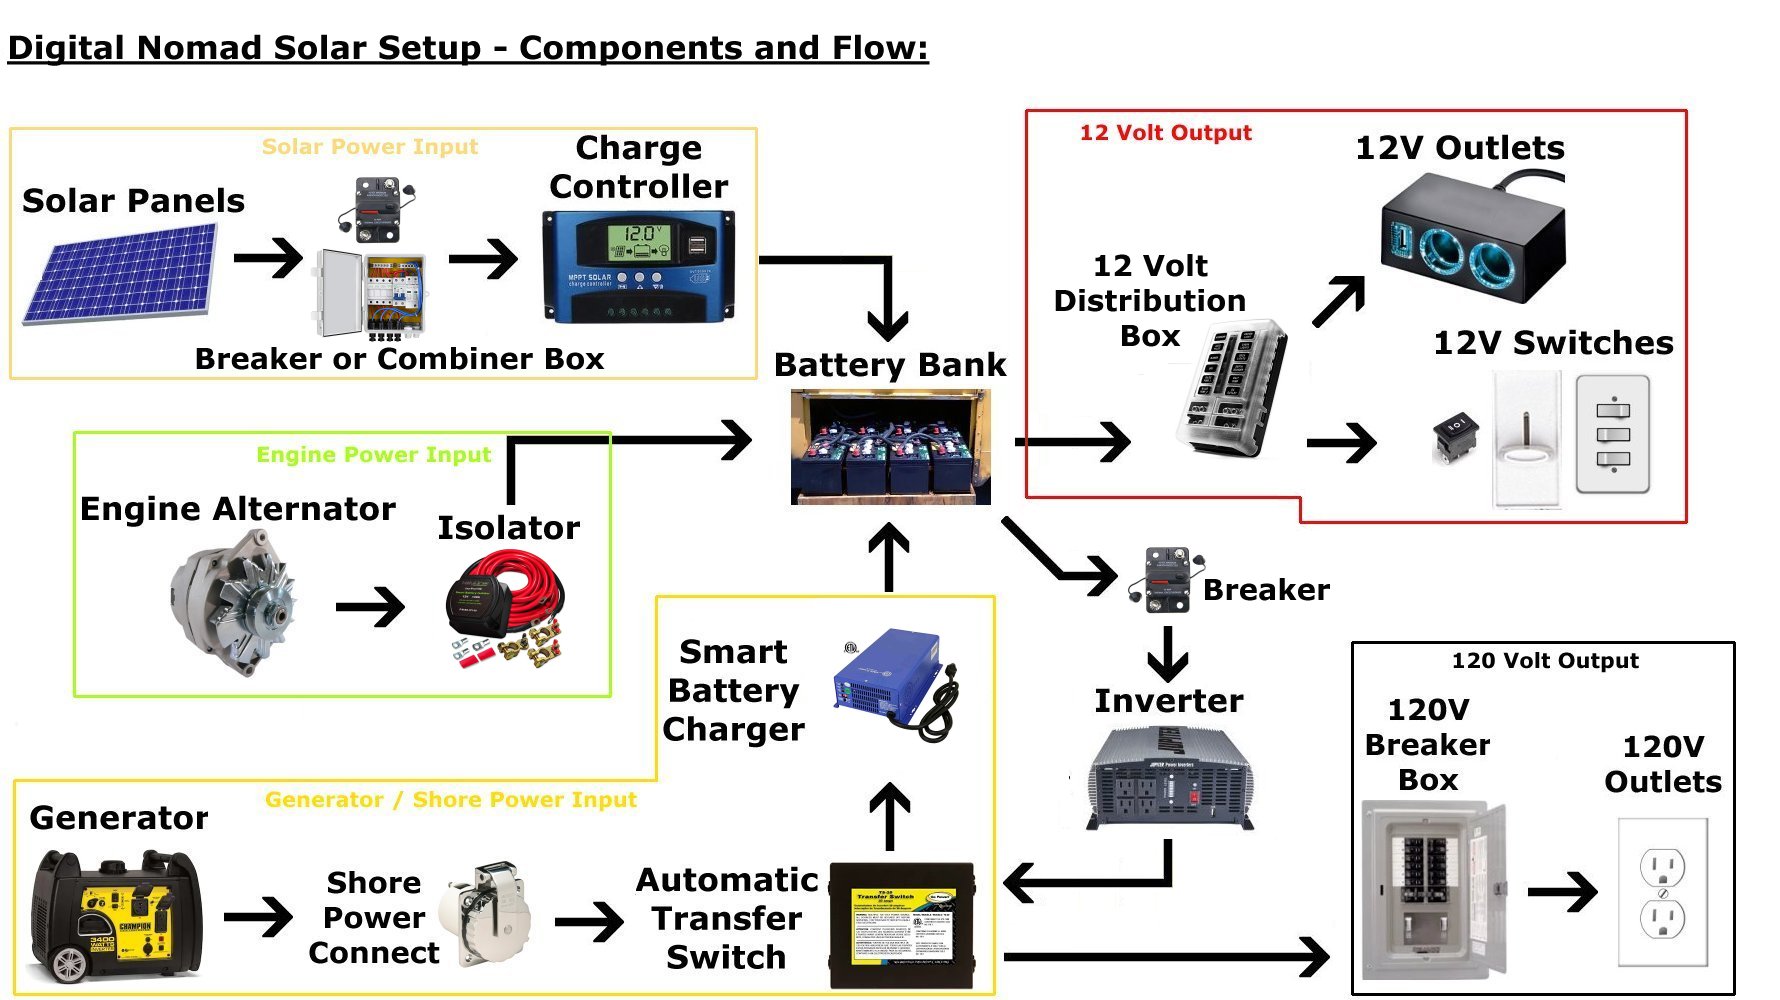
We are not electricians or engineers. It’s easier than it looks, but we're not going to tell you which wires hook up to where. Once again, Read The Manual, watch videos, and if you get stuck or confused, call a local electrician to come out and help. It's pleasantly surprising just how DIY an RV Solar Hookup can be, but it's not a place to take chances or guess.
Now that you know the basic components of a Skoolie or Vanlife Solar Setup, let's put it all together and consider the Frequently Asked Questions you will face along the way:
Be sure to check out our Solar Page for more options and product comparisons.
What are the best RV Solar Panels? - In addition to the installation styles (Rigid, Flexible, and Portable) Solar Panels come in 3 main types: Monocrystalline, Polycrystalline, and Thin-Film. Monocrystalline is generally the most expensive and most efficient, but Polycrystalline Panels are almost as efficient (about 5% less), and come in at a lower price. Thin-Film Panels are the least expensive and least efficient. They’re usually “Flexible” (will fit the curvature of a Skoolie or Airstream roof), and reputed to be more durable and easier to mount. However, since using direct mounted Flexible Panels doesn't allow for air-flow under the panels, they are more susceptible to heat (reducing efficiency even further). You can also find “Mono” or “Poly” Flexible Panels, but will still see a drop off in overall efficiency for the same reasons. More heat = less efficient, and the curve of a Flexible Panel means less of it directly faces The Sun.

Which Type, and How Many Solar Panels Do I Need?: - You could spend Years doing the math on this, but if you’re willing to start small and scale up, we can just look at the answers in the back of the book.
Make your own choices, but here are our thoughts based on current pricing and output: Let’s scratch Thin-Film from the list since the savings doesn’t appear to offset the drop in efficiency. The price difference between Rigid and Flexible isn’t huge, so it comes down to how much you really want to give up a little efficiency by mounting them directly to the surface of your Bus.
“Poly” Panels seem to be roughly 75% the cost of “Mono” Panels of similar output. If you’re in for the long haul, and have a few extra dollars, by all means, go with Monocrystalline.
UPDATE (8/2/2020): A Recent Price Drop makes The Renogy “Mono” panel featured above far and away the best bet! You can get a “Poly” panel for about $20 less, but this is the way we would go.
As For “How Many”: the correct question is actually “How Much”, meaning how much total wattage of all your Solar Panels. Take a look at our Solar Cheat Sheet for an idea.
Should I use “High Voltage” Solar Panels?: - No. These are really geared toward Home Applications that sell off extra power to the grid. In this case, the bigger number doesn't mean a better product. Your Batteries only need between 10.5 and 14.7 Volts to charge, and the Voltage isn't what actually charges them. Additionally, some Charge Controllers aren’t designed for anything over 18 Volts input. Think Wattage more than Voltage.
Should I tilt My Solar Panels toward The Sun? - Probably... but only when you're stationary. Also, don't expect the difference to be “night and day”. You'll never actually get 160 Watts out of a 160 Watt Solar Panel unless you happen to be parked on the Tropic of Cancer, at noon, on the Summer Solstice. - Short of using Portable Solar Panels and constantly moving them to face directly into The Sun, you might just as well mount all of them on the same side of the roof and always try to park with that side facing South. A bracket that allows you to manually tilt up to 45 degrees or so will certainly make a difference, but isn’t an absolute necessity. (Check the bottom of the Solar Page.)
Should I Wire my System in “Series” or “Parallel”?: - Parallel… For Now… If you’re Solar Array gets up to around 800 watts or more, you’ll want to revisit this idea (and do the math), but for the rest of us, and for most RV Solar Applications, 12 Volt Panels (Parallel) running into 12 Volt Batteries (Parallel) works just fine. - It’s somewhat easy to change it later if you so desire.
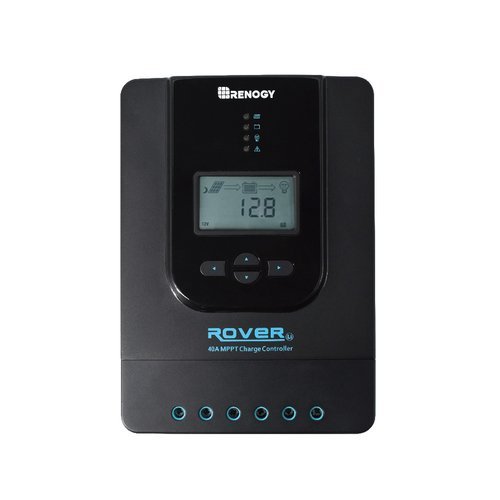
What Solar Charge Controller Should I use?: - Charge Controllers come in “PWM” or “MPPT”. In short, PWM is cheaper, but an MPPT Charge Controller is more efficient, and more “flexible” on Voltage and Current. As you are most likely going to run a 12 Volt system, “Amperage” is your biggest concern. The Amp Rating is the highest Amperage the Charge Controller will handle. “MPPT 40” means it can handle 40 Amps Max.
The over-simplified version of the math is: The Amp rating you need is equal to the total wattage of your RV Solar Panels, divided by the system Voltage, multiplied by 1.2 (for safety). So 200 Watts (Panels) / 12Volts (Batteries) x 1.2 = 20 Amps. For a shortcut, you can estimate a 12 Volt (Parallel) System at 10% Solar Array Wattage. This would mean that for a setup of no more than 200 Watts in total Solar Array you can use a 20amp Charge Controller. (Most RV Solar Kits come this way.) 300 Watts = 30amps. 400 Watts = 40amps, etc. **This isn’t accurate for a 24 or 48 volt system.
If you want to be safe and leave yourself some “headroom”, spend a little extra and get the next size up. Buy an MPPT Charge Controller if you can, but it’s fine if your Kit comes with a PWM or if you start with that to save a few bucks. You can always upgrade later if needed.
For you gear-heads and mathematicians, Renogy has a more in-depth explanation of it Here.
What's the best Battery for RV Solar?: - There are 3 main battery types used for Skoolie and Vanlife Solar Applications: Flooded Lead, Sealed Lead, and Lithium. - Flooded Lead are the cheapest, but require regular maintenance and need to vent gas. They will run your system perfectly well, but make absolutely certain your Solar Battery Bank is easy to access and well ventilated if you go this route. (Also, Flooded Lead Batteries need to stay at 50% charge or better.)
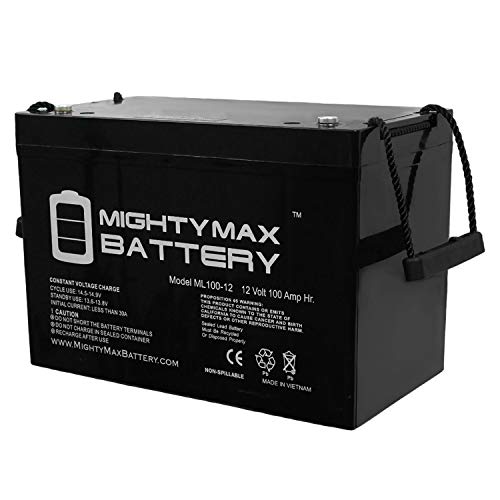
Sealed Lead come in 2 varieties, “AGM and “Gel”. Both are maintenance free, but the Gel units tend to charge slower and put out less power per charge. Lithium Solar Batteries are the most efficient, and have a substantially longer lifespan, but by far the most expensive. Spend the extra cash on Lithium if you have it, but decent AGM Batteries will do just fine, for several years, with appropriate use and charging. - The best “bang for buck” AGM Battery is featured. Check the Solar Page for more options.
Short Bus Tips: - It's not a good idea to mix and match. Using any combination of AGM, Lead Acid, and Lithium Solar Batteries will decrease the efficiency and lifespan of all of the batteries in your Solar Battery Bank. **Additionally, Only use “Deep Cycle” Batteries for your Solar Setup. They are designed to be charged and discharged multiple times, as where the battery in your car (“Shallow Cycle”) is not.
How do I “Size” Batteries or Match Batteries to Solar Panels: - Actually, you need to Size your whole Setup. - For optimum efficiency, everything should match. Your Solar Panels, The Charge Controller, and The Batteries should all be calculated to each other, based on your Usage… (Yeah… That’s why they had you plugging in the wattage and hours used for all of your appliances…) The good news is that there is a Shortcut!
On a 12 volt system, an accepted rule of thumb is to match the Amp Hours of your Batteries to the wattage of your Solar Array. (Remember the 10% rule on Charge Controllers?): 200 watts of total Solar Panels = a 20 amp charge Controller, and 200 amp hours of Solar Batteries. (Two 100 Amp Hour Batteries = 200 Amp Hours.) Yes, it’s basically that simple! If you really want to do all the math, click Here, and settle in for a long night.
How Many Batteries do I need for my Van?: - You can start with one but, as noted above, if you have 200 watts of Panels, you should have a 200 amp hour Solar Battery Bank. If you’re starting small, be sure you leave room in your Build Design to add Batteries and Panels if needed.
Spacing Components, How Much Wire do I need?: - That depends on your Rig and how/where you place the components. It is very important, however, to keep the distance between your components as short as possible, especially the Inverter and the Batteries. You will notice a dramatic drop off in efficiency with the more wire or space you have between them. (*A coiled up 6’ wire still equals 6 ft. of space. Trim your wires!)
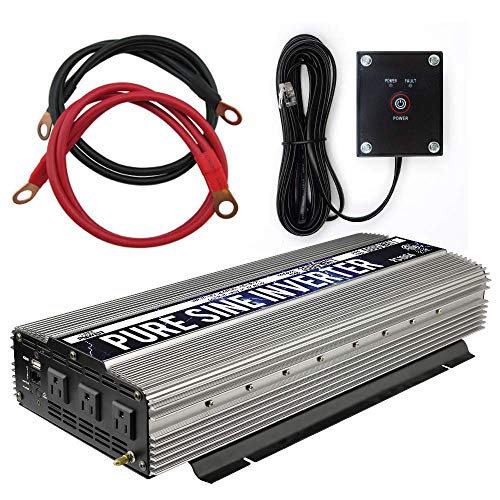
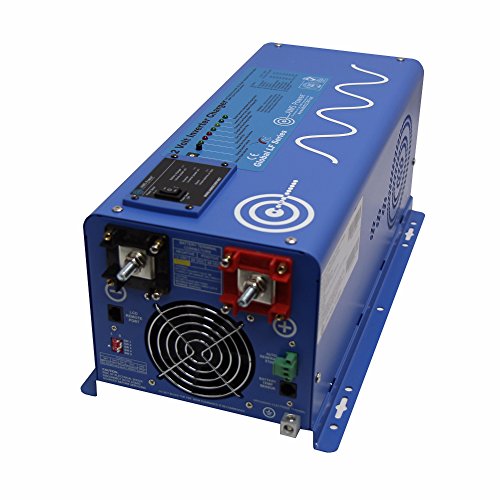
What RV Inverter should I use in my Skoolie?: - 3 Words, “Pure Sine Wave”. Modified Wave Inverters are slightly less expensive, but if you run or charge any electronics you should stay away from them. -As far as what size? -If you know that you'll be using a microwave or hair dryer you will need at least a 1500w Inverter. If you plan on using an Induction Cooktop you’d better go with 2000w. Throw any kind of A/C into the mix and 3000w is just about a foregone conclusion. - Read through our 10 Tips to Save Power Blog and take a look at our Solar Cheat Sheet for more thoughts.
Read the box, or look for “wattage” on every appliance you plan to use and be sure your Inverter can handle the Peak. It's also a good idea to use only One 120v appliance at a time until you start to understand what draws the most Power.
*Bigger is not always better here. When in use, your Inverter will only draw the power it needs, but at rest, a 3000w Inverter will use (waste) more Power than a 1500w Inverter. Our top Inverter choices, by size, are on the Solar Page.
Do You Need a Breaker Box on an RV?: - Yes! In fact you should really have breakers or fuses between each major component of your system. A Breaker will also act as a Disconnect Switch. - Very highly advised for whenever you need to do maintenance. - What size of breakers you need is a little more complicated. Fortunately, the manual (or box) will almost always tell you. We go a little more in-depth in our Solar Cheat Sheet.

What's the best way to Switch from The Inverter to Shore Power or Engine Charging?: - We do know people that have a Manual Switch that says “Shore”, “Engine”, “Off” (Off = House Battery)... that will work fine, as long as you know where it is and where it should be at all times. However, an Automatic Transfer Switch for Shore Power, and a separate Isolator Switch for the Engine, will just make life easier. Additionally, an Automatic Switch will stabilize (optimize) the input power from whatever source is being used.
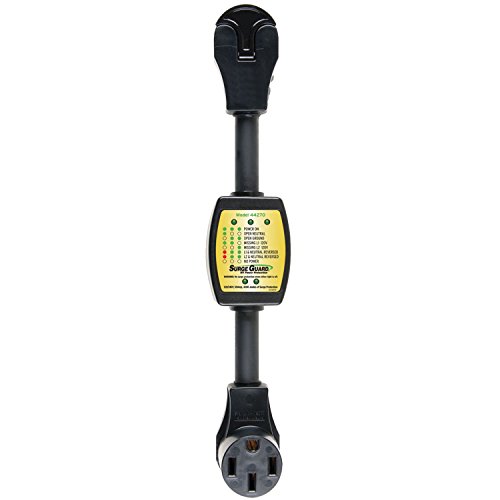
Short Bus Tips: !!Since your Inverter is now connected to the Automatic Transfer Switch (see Chart above) make sure that your Inverter is switched OFF whenever you are connected to Shore Power. Even if your Automatic Switch disconnects the Inverter from the system, you're still drawing power from the batteries to run the Inverter. - Additionally, it’s a very good idea to use an RV Surge Protector whenever hooked up to Shore Power.
What about a Hybrid Inverter that has a built in Transfer Switch and/or Charger?: - Sure. You can save space by using a Hybrid Inverter/Charger/Transfer Switch. While it is likely more efficient and easier to set up, be sure to consider the overall costs, including if you ever need to replace it.
Remember that if this item ever fails you have No backup for your 120v System. You'll only have 12v and Solar Charging until you can sort it out. (So be sure to install an additional “Shore/Generator Only” Input directly to your 120v Breaker box.)
Can I charge my Batteries with Solar and Shore Power at the same time?: - Yes. Your Charge Controller will basically sense the power coming from Shore (or the Engine) as a charge on the batteries and limit accordingly.
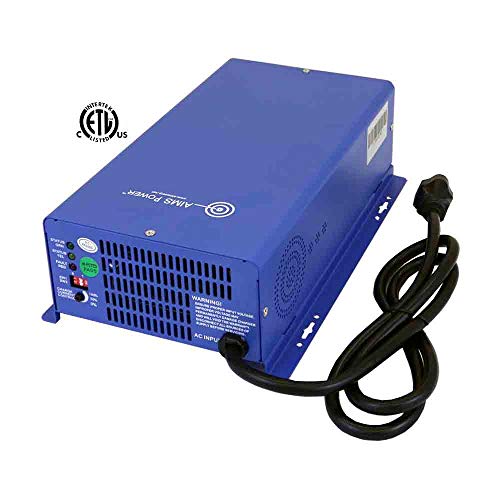
What is a “Smart” Battery Charger?: - Just what it says. It will charge your batteries while connected to Shore power, but adapts the inbound power to optimize for the size of the bank, current charge level, and type of Batteries you have.
Do I need an RV Generator and an RV Converter?: - Yes on the Generator. No on the Converter (although, your Smart Charger technically is a Converter). While you don't absolutely have to carry a Generator in your Rig, it is a very good idea to have one for when there is minimal Solar and no Shore available. You don't need a separate RV Converter for This Setup because you're plugging the Generator into your Shore Power Input and Charging your Batteries with it. (Your 12 Volt system already runs off of the Batteries.)
How much Space will my Solar Setup Take?: - On the roof, it will depend on the number and size of the panels. - Most people put all of the other components together (for good reason) in a specific part of the Rig. The number and size of batteries will have the biggest effect, but the rest of it shouldn't be too constraining on space. If you can't have the items on hand before doing your final Build Design, get the measurements online, or try to leave yourself at least a 3' x 3' square, 16”-20” high. If you find that you don't scale up very much once you hit the road, you'll have a little space to re-purpose for other things.
The most difficult design aspect to figure out regarding electricity may be where and how you will run the wiring, not only for your Solar Setup, but also for appliances, lights, and outlets.
Update (8/8/2020): By Popular Request, and for those who want to skip the math altogether, we’ve created a Solar Cheat Sheet to provide a more clear picture of sizing your system
Be sure you check out out Solar Page for more options and product comparisons, as well as Wire, Connectors, and Brackets.
Quick Links:
Start The Engine - Establishing a Budget - Making a Living on The Road - Choosing a Rig - Do I Need A CDL? - Designing a Skoolie Build - Step By Step Build Order - Doing a Build On The Cheap - 10 Tips to Save Power and Money - Skoolie Build Ideas - Skoolie Solar Setup - Vanlife Water Setup - RV Propane Setup - Solar Cheat Sheet - Skoolie, Van, & RV Air Conditioning DE_Mystified! - Skoolie Heating - Digital Nomad Connectivity - Choosing a Domicile State - Converting a Commercial Title - Van, Skoolie, and RV Insurance - Camping Clubs, Subscriptions, and Passes.
Jump To Page:
Home - Solar - Cooking - Refrigeration - Water - HVAC - Tech - RV Accessories - Gear - Swag.